ROC827 Instruction Manual
Issued Mar-06 Power Connections 3-26
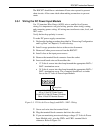
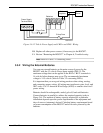
7. Insert a plastic screwdriver behind the battery and gently push the
battery out of the battery holder. Note how the battery is oriented:
the negative side of the battery (–) is placed against the CPU and the
positive (+) towards the + label on the battery holder.
8. Insert the new battery in the battery holder paying close attention to
install the battery with the correct orientation.
9. Reinstall the CPU (as described in “Installing the CPU Module” in
Chapter 2, Installation and Use).
10. Replace the CPU faceplate.
11. Replace the two screws to secure the CPU faceplate.
12. Replace the wire channel cover.
13. Review “Restarting the ROC827” in Chapter 6, Troubleshooting.
14. Apply power to the ROC827.
3.6 Related Specification Sheets
Refer to the following specification sheets (available at
www.EmersonProcess.com/flow
) for additional and most-current
information on the Power Input modules for the ROC827.
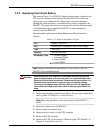
Table 3-18. Power Input Module Specification Sheets
Name Form Number Part Number
Power Input Modules (ROC800-Series) 6.3:PIM D301192X012


