


1-8
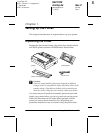
Setting Up the Printer
L
R4C7930
shrimp.bk Rev.C
shrimpsetup.fm A5 size
11/26/01 Pass 1
Proof Sign-off:
ABE Y. Azuma A. Nagasawa
T. Takahashi
ABE S. Halvorson
Connecting the Printer to Your Computer
Your printer is equipped with both an IEEE-1284-compatible
parallel interface and a USB (Universal Serial Bus) interface. It
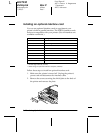
also includes a Type-B optional interface slot in case your
computer requires a different type of printer interface. (See
“Installing an optional interface card” on page 1-10.) Connect
your computer to the desired interface as described below.
Note:
You can connect a cable to both interfaces; the printer switches
automatically to the appropriate interface when it receives data.
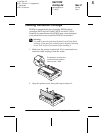
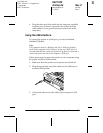
Using the parallel interface
To connect your computer to your printer’s built-in parallel
interface, you need a shielded, twisted-pair parallel cable with a
36-pin Centronics
®
compatible connector for the printer.
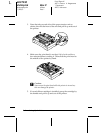
1. Make sure the printer and computer are turned off.
2. Plug the parallel cable connector securely into the printer’s
parallel interface port. Squeeze the wire clips together until
they lock in place on both sides of the connector.
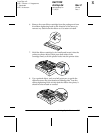
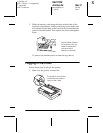
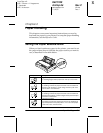
3. If there is a ground wire
at the end of the cable,
attach it to the printer’s
ground connector as
shown below.