5.2 Saving Data in the Specified Folder
ScanSnap S300M Operator's Guide 93
About Actions
5
[Browse] button
Clicking this button displays the "Select folder to Save" window. Specify a
destination folder in the window.
[History] button
When this button is clicked, a list of folder names are displayed. Up to ten
folder names that have been added are displayed in reverse chronological
order. The names of folders specified before these ten folders in the list are
not displayed. Folder names that have been changed using the "Save in"
field, or that have been specified in the window which pops up when
clicking the [Browse] button, are added to the "History" list. Select a folder
name to display it in the "Save in" field. In addition, you can delete all folder
names from the "History" list by selecting [Clear History] at the bottom of
the "History" list.
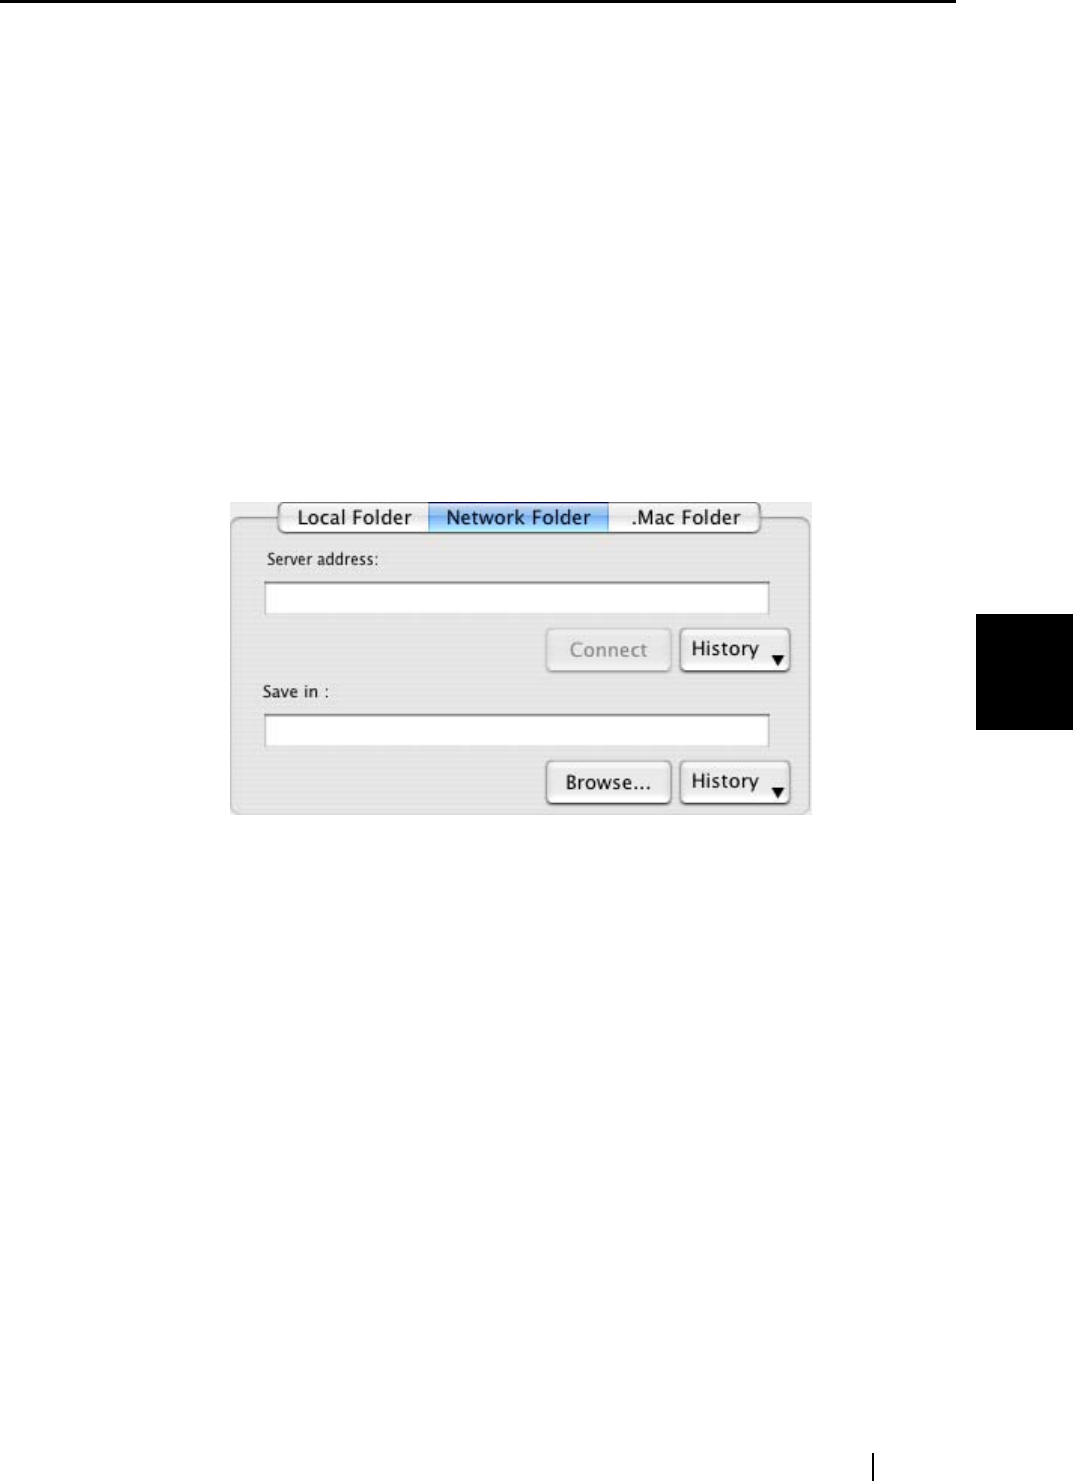
Network Folder
The destination folder of files in the network is displayed. You can change
destination folders in this field.
Server address
Specify the address of the server to connect to. You can specify the
following two types of servers.
afp://(Server_name): For Mac server
smb://(Server_name): For Windows server
[Connect] button
Clicking this button connects the ScanSnap with the server specified in
"Server address."
[History] button
Clicking this button displays a list of the servers that have been connected to
the ScanSnap before.
Save in
The full path of a folder in which selected files are saved is displayed. The
path to the most recently saved folder is displayed as the default. You can
also type in a full path to change the displayed one. Click the [Browse]
button and display the "Select folder to Save" window to specify a different
folder. The path to the selected folder is displayed in the field. You can


