48
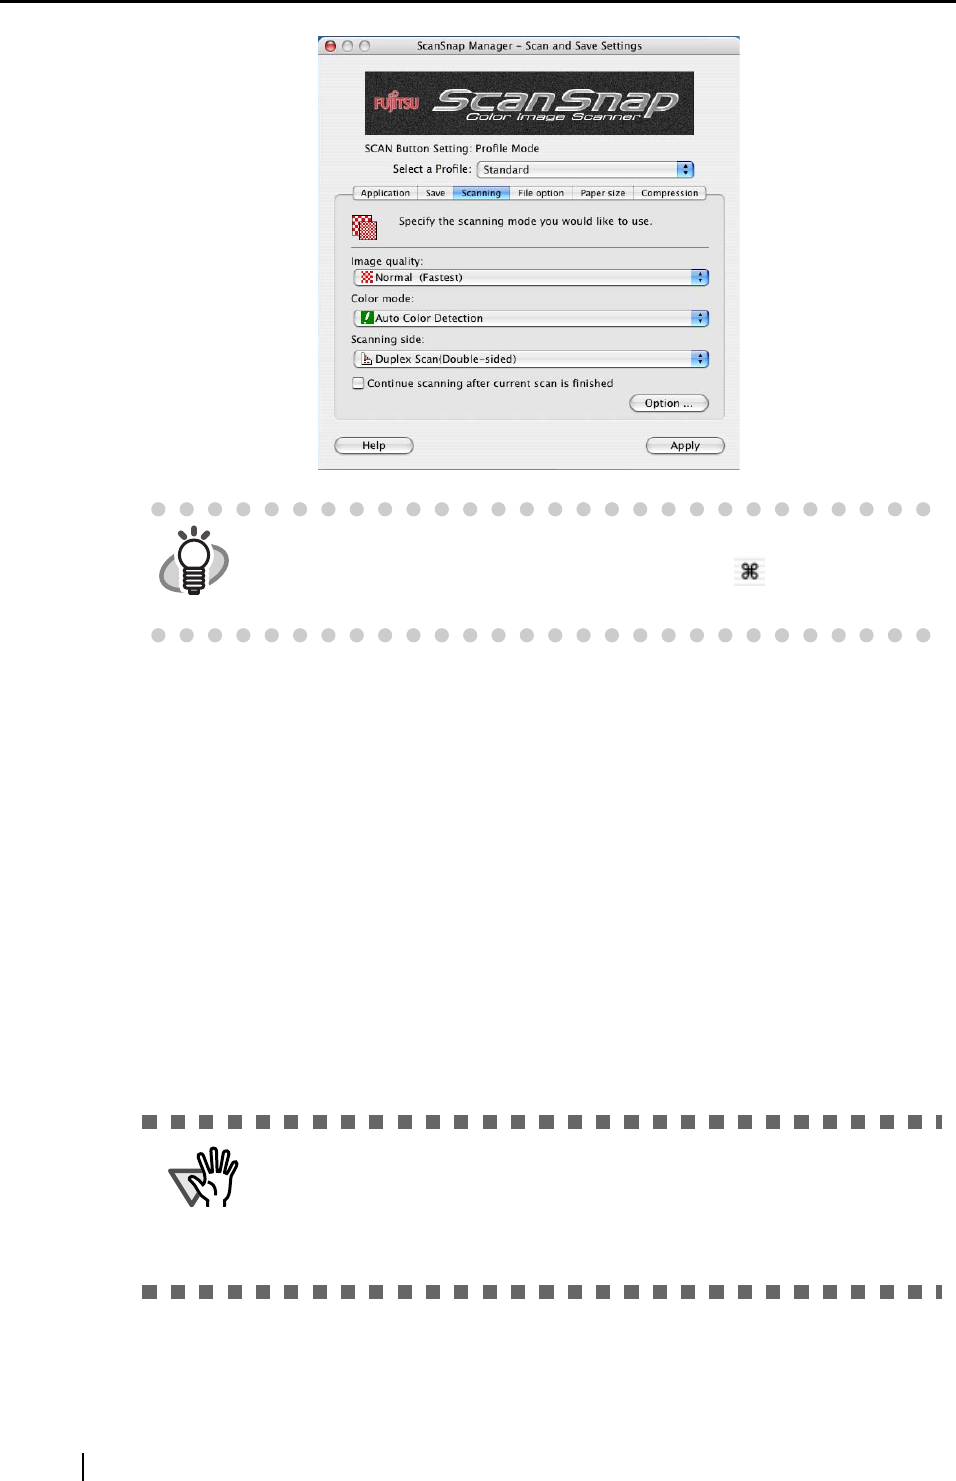
2. Change the scan settings in each tab in the "ScanSnap Manager - Scan and Save
Settings" window.
The following settings can be changed:
• The application that starts automatically and interacts with ScanSnap
D "[Application]
tab" (page 51)
• The destination to save scanned images
D "[Save] tab" (page 55)
• Scan mode (fast or slow, excellent or normal, color or black-and-white, enable or disable
[Setting for text only document], [Allow automatic blank page removal], [Correct skewed
character strings automatically], and/or [Allow automatic image rotation], and whether
[Continue scanning after current scan is finished])
D "[Scanning] tab" (page 58)
• File format for the scanned image
D "[File option] tab" (page 63)
(file format and number of pages per PDF file)
• Paper size of the document
D "[Paper size] tab" (page 65)
• File size for saving scanned images
D "[Compression] tab" (page 68)
3. Click the [Apply] button.
⇒ Settings on the "ScanSnap Manager - Scan and Save Settings" window have been changed.
HINT
You can also open the "ScanSnap Manager - Scan and Save Settings"
window by simultaneously pressing the [Command ( )] and [S] keys on
the keyboard. (This can be used only when ScanSnap Manager is active.)
ATTENTION
Settings for scanning vary between Quick Menu Mode and Profile Mode.
For details, refer to "Appendix B Quick Menu Mode / Profile Mode" (page
195).
In this section, the "ScanSnap Manager - Scan and Save Settings" window
in Profile Mode is used as examples.


