126
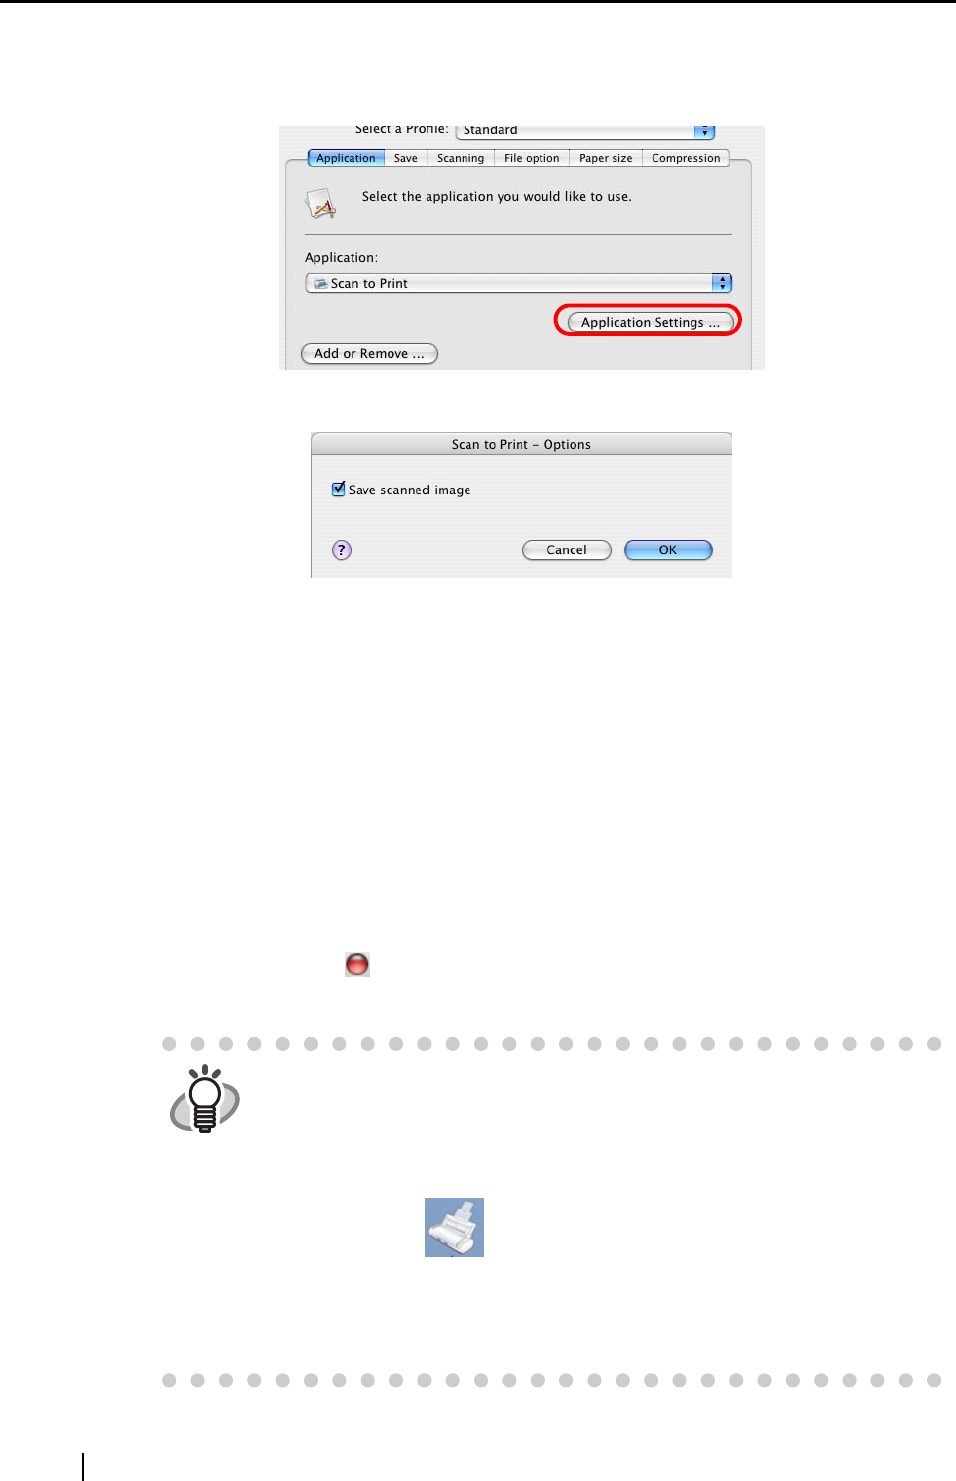
3. When you want to change settings for the [Scan to Print] action, click the [Application
Settings] button, and then change settings.
(When you do not want to change settings, go to Step 5.)
⇒ The following window appears.
In this window, you can change settings for the [Scan to Print] action as follows:
"Save scanned image" checkbox
Printed document images are saved in PDF format.
PDF files are saved in a folder specified in the "Image saving folder" field on the
[Save] tab of the "ScanSnap Manager - Scan and Save Settings" window (page
55).
4. Click the [OK] button.
⇒ The "Scan to Print - Options" window is closed.
5. Click the [Apply] button.
6. Click the close button
in the upper left corner of the window.
⇒ The "ScanSnap Manager - Scan and Save Settings" window is closed.
HINT
• To start scanning right after selecting the profile, press the [SCAN] button
on the ScanSnap. Doing so also closes the "ScanSnap Manager - Scan
and Save Settings"
• "Scan to Print" profile can be selected by selecting "Scan to Print" in the
"Select a Profile" window which pops up when clicking the ScanSnap
Manager icon .
• Changes you have made in the above procedure take effect from the next
time you scan documents using the profile.
For details on how to change settings, refer to "4.3 Saving Scanning
Settings" (page 70).
