


Secure Perfect 6.1.1 User Manual 243
Data Key: Secure Perfect supports two methods of data encryption standards: DES and DESIII.
• DES: When you select this method, only one dialog box is available for input. Enter 16
unique hex characters in this binary field. We recommend that you do not repeat any
character. The additional two dialog boxes are unavailable for entry.
• DES III: Enter 48 unique hex characters in the binary dialog boxes, in three 16-character
stirngs.
If you do not enter unique hex characters, this micro record will not save. An invalid field
message will display, informing you that the keys that were chosen are too weak.
• Edit: Click to re-assign or revise an existing encrypted data key for a selected micro. When
you click this button one time, this button label changes to Auto Generate.
• Auto Generate: Click this button to system-generate a data key. We recommend that you
record this number.
Select Columns
This option allows you to select columns that you want to display on the Micro Utility Form by putting a
check next to the column name. When you click OK, the selected columns are saved so you will not have
to select again the next time the form is opened.
If you are licensed for Client Redundancy, the column Default Hostname is available for selection. If
not licensed for Client Redundancy, this selection is unavailable.
Clicking this icon from the Micro Utility Form toolbar will access this option:
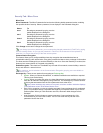
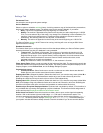
Select Criteria and Micro Selection
Clicking this icon from the Micro Utility Form toolbar will access this option:
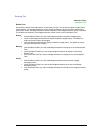
This dialog box allows you to enter search criteria for available micros, from facilities to which you have
access, that you want to add to your view or remove from the list of displayed micros, based on the
results of the search criteria. Complete one or more of the search criterion.
Micro Description: Enter a micro description for which to search. You may use wildcard characters as
part of the search criteria.
Micro Address: Enter a micro address.
Online, Offline, Error: Select micros that meet the search criteria and are online, offline, or in an error
state.
Hostname: Select a host name.
Comm Port: Select a Comm Port.
Available Micros The micros are displayed that meet the search criteria and are not already selected to
be displayed in the Micro Utility Form.
Selected Micros: This box displays the results of the search. The list of micros are those that meet the
search criteria and are selected to be displayed.
Search: Click to display the micros as requested by the parameters you selected.
Clear Search: Clears the micro search criteria and selection parameters from the form windowpanes,
allowing you to selected new criteria.
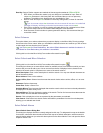
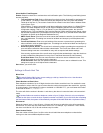
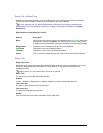
Select Default Alarms
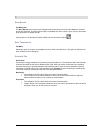
Select Default Alarms Dialog Box
This dialog box displays all alarms currently assigned to this map. To designate this map as the default
for an alarm, select each alarm that should have this map as its default association, which means this
map will display whenever you select this alarm point from the Alarm Monitor Form and open the Alarm
Graphics Viewer Form.