


Operation
30 Zebra XiII Printer User’s Guide
Initial Printer Power-Up
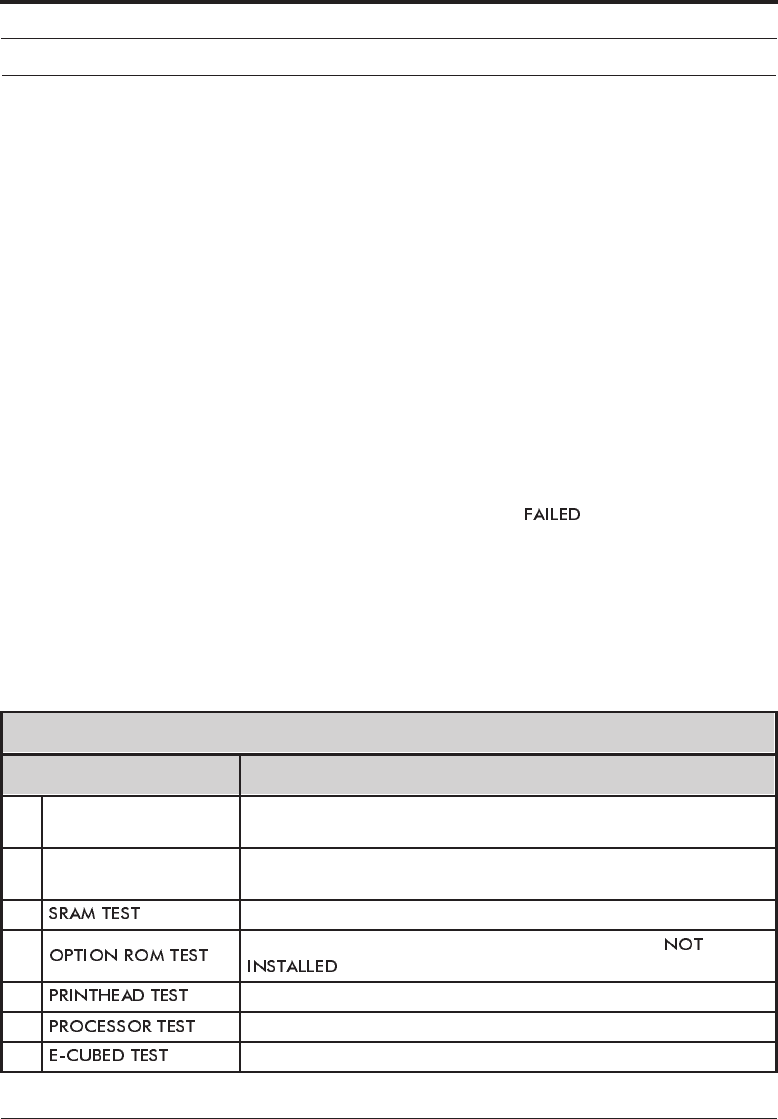
Each time you turn the printer on, it automatically performs a self-test
called the Power-On Self Test (POST).
Turn the printer on now by pressing the Power Switch at the rear of the
printer. The Front Panel Power-On indicator will light up. The other front
panel indicator lights and the Liquid Crystal Display (LCD) monitor the
progress of the Power-On Self Test (POST). The self test sequence is shown
in Table 4.
The POST prompts are in English unless an error occurs, in which case the
display cycles through all available languages repeatedly. However, you
may change the display language for all other prompts. Refer to “Selecting
the Display Language” on page 49.
Note: If the printer fails any of these tests, the word “ ” will be added to the
display. If this occurs, refer to the Troubleshooting section (starting on
page 63).
If loading the printer with media and ribbon for the first time, or changing
the type of media, perform the Calibration on page 38.
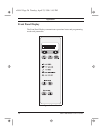
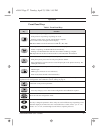
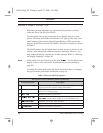
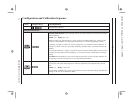
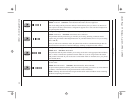
Table 4. Power-On Self Test Sequence
This sequence occurs each time the printer is powered up.
Front Panel Display Description
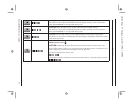
1.
All indicator lights turn on simultaneously. Then, through the following
steps, they turn off in sequence starting at the bottom.
2.
Three different sets of characters will be displayed to verify that the dis-
play screen is working properly.
3. SRAM functionality test performed.
4.
Optional ROM functionality test performed. (The words “
” will be added to display if no optional ROM is used.)
5. Printhead is checked for proper operation.
6. Processor functionality test performed.
7. E-Cubed functionality test performed.
xi2ch2 Page 30 Tuesday, April 23, 1996 1:45 PM