


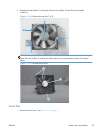
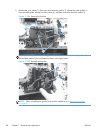
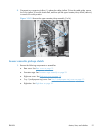
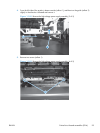
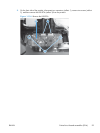


4. From the left side of the product, release one tab (callout 1), and then turn the guide (callout 2)
slightly in the direction indicated and remove it.
Figure 1-148 Remove the high-voltage power supply assembly (3 of 5)
1
2
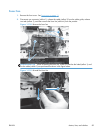
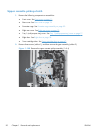
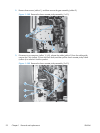
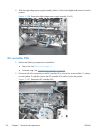
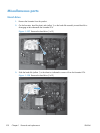
5. Remove two screws (callout 1).
Figure 1-149 Remove the high-voltage power supply assembly (4 of 5)
1
ENWW
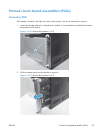
Printed circuit-board assemblies (PCAs)
95