


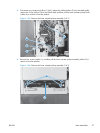
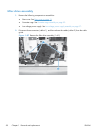
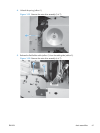
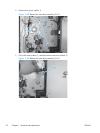
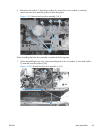
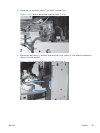
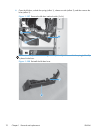

4. Release the link (callout 1) from the pin (callout 2), remove four screws (callout 3), and then
remove the fuser drive assembly (callout 4) from the product.
Figure 1-99 Remove the fuser drive assembly (3 of 3)
1
3
4
2
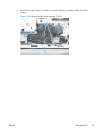
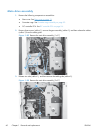
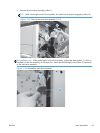
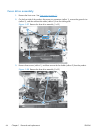
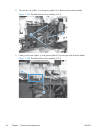
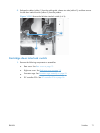
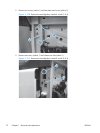
When reinstalling the fuser drive assembly, complete the following steps.
1. When reassembling the fan wire, place the leading end of the wire (callout 1) in the hole (callout
2) under the front fan (callout 3) first.
Figure 1-100 Reinstall the fuser drive assembly (1 of 3)
2
3
1
ENWW
Main assemblies
65