


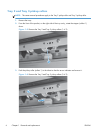
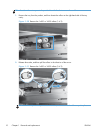

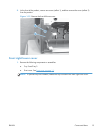
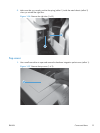

2. Remove two screws (callout 1), and then slide the rear cover (callout 2) in the direction indicated
to remove the cover from the product.
Figure 1-18 Remove the rear cover (2 of 2)
2
1
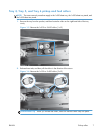
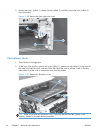
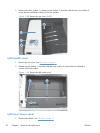
Reinstallation tip During reinstallation, make sure that all cables are correctly positioned and not
pinched against metal parts of the chassis when you slide the rear cover into place.
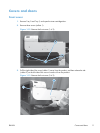
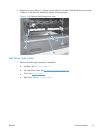
Front left lower cover
1. Remove the following components or assemblies:
●
Tray 2 and Tray 3.
●
Front cover. See
Front cover on page 11.
14 Chapter 1 Removal and replacement ENWW