HP Omnibook XE3 (Technology Codes GE and GD) Removal and Replacement 2-7
Removing the Mini-PCI PCA (selected models)
(User-Replaceable)
Certain notebook models include a mini-PCI PCA that contains either a modem or modem/LAN.
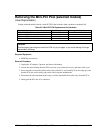
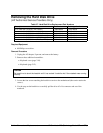
Table 2-5. Mini-PCI PCA Replacement Part Numbers
Description Part Number Exchange Part Number
PCA, mini-PCI (LAN/modem) F2409-60907
PCA, mini-PCI (LAN/modem) Malaysia F2409-60908
PCA, mini-PCI (modem) F2409-60909
PCA, mini-PCI (modem) Malaysia F2409-60910
Caution
Provide proper grounding and handle the PCA only by its edges, or you could damage it through
electrostatic discharge.
Required Equipment
•
#0 Phillips screwdriver.
Removal Procedure
1.
Unplug the AC adapter, if present, and remove the battery.
2.
Loosen the screw holding the mini-PCI cover (the cover retains the screw), and remove the cover.
3.
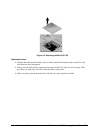
Press outward to release the latches at the sides of the PCA, and carefully lift its free edge up. Note
that the PCA has several sticky pads on the side facing the motherboard.
4.
Disconnect the cable (modem models only) or cables (modem/LAN models only) from the PCA.
5.
Gently pull the PCA out of its connector.


