


Readiris
The Readiris OCR program is included on a separate CD-ROM that shipped with the product. To use
the Readiris program, install it from the appropriate software CD-ROM, and then follow the instructions
in the online Help.
Use the Scan To feature
●
Scanning from the product control panel is only supported with a full software installation.
HP ToolboxFX must be running to scan by using the Scan To button or the Start Scan button.
●
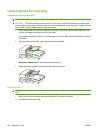
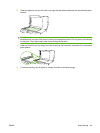
For the best scan quality, place your originals onto the flatbed scanner, rather than loading them
into the automatic document feeder (ADF) input tray.
●
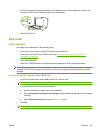
The computer that is connected to the product must be turned on.
Set up the product Scan To button
Destinations must be set up prior to using the Scan To button on the control panel. Use HP LaserJet
Scan to program the folder, e-mail, and program destinations for scanning.
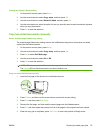
Set up destinations on the product
1. Click Start, click Programs (or All Programs in Windows XP), click HP, click the product, click
Scan, and then click Settings.
2. Select Change the destinations that show up on the all-in-one control panel.
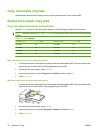
3. The product is pre-configured with the following three destinations in the dialog box.
●
Scan a document and attach it to an e-mail
●
Scan a photo and attach it to an e-mail
●
Scan a photo and save it as a file
4. Highlight a destination and click the arrow to move to the destinations currently on the dialog box.
Repeat for all three destinations.
5. Click Update.
Add destinations
1. Click Start, click Programs (or All Programs in Windows XP), click HP, click the product, click
Scan, and then click Settings.
2. Select Create a new destination with settings that I specify.
3. Do one of the following:
●
For folders, select Save it to my computer, and then click Next.
●
For e-mail, select Attach to a new e-mail, and then click Next.
●
For programs, select Open it in another software application, and then click Next.
4. Enter the file destination name or check to set up the destination on the product. Name the default
destination, and then click Next.
ENWW Use scan 85