SpecificationsCBI/CGI Technical Reference
Chassis Plans 1-13
CONFIGURATION
J
UMPERS
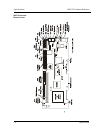
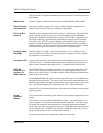
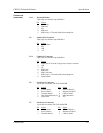
The setup of the configuration jumpers on the SBC is described below. * indicates the
default value of each jumper.
______________________________________________________________________
NOTE: For two-position jumpers (3-post), "RIGHT" is toward the bracket end of the
board; "LEFT" is toward the memory sockets.
______________________________________________________________________
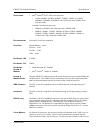
Jumper
Description
JU7 Combo I/O (P5A) Speaker Connect
(Also refer to JU18 - Combo I/O Reset Connect.)
Install to connect speaker data signal to pin 8 of the Combo
I/O connector (P5A). *
Remove to disconnect.
JU8 Password Clear
Install for one power-up cycle to reset the password to the
default (null password).
Remove for normal operation. *
JU9 CRT Type Select
Install on the LEFT for a monochrome CRT.
Install on the RIGHT for a color CRT. *
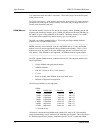
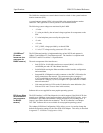
JU10/JU11 System Flash ROM Operational Modes
The Flash ROM has two programmable sections: the Boot
Block for “flashing” in the BIOS and the Main Block for the
executable BIOS and PnP parameters. Normally only the
Main Block is updated when a new BIOS is flashed into the
system.
JU10
JU11
Program All (Boot and Main) Bottom Bottom
Normal PnP (Program Main Block) Bottom * Top *
Write Protect Top Top
JU12 CMOS Clear
Install to clear.
Remove to operate. *
__________________________________________________
NOTE: The CMOS Clear jumper works on power-up. To
clear the CMOS, power down the system, install the jumper,
then turn the power back on. CMOS is cleared during the
POST routines. Then power down the system again and
remove the jumper before the next power-up.
__________________________________________________


