


2-52 Intel® Server RAID Controller U3-1 User’s Manual Rev 1.0
Advanced Installation Steps
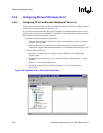
2.5.7 Uninstalling Intel Server RAID Controller U3-1 from NT
Server
To remove the (product name) from your NT Server follow the instructions below.
1. Ensure that you have closed all applications and are logged in with adminstrative rights.
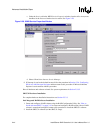
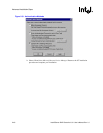
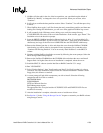
2. Open Control Panel and launch the Add/Remove programs icon.
3. Select the RAID Software Suite and click Add/Remove.
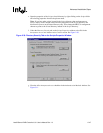
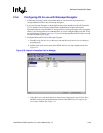
4. Click Yes to confirm removing the RAID Software Suite. The uninstallshield program will
start removing files and display a progress bar. After the programs have been completely
removed from your system, the unInstallShield program will show a summary of files
removed and updates completed while removing files from the system. It will also recommend
that the user restart the server. Do not restart the server here. Continue with this procedure to
complete the removal of the SRCU31software suite.
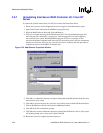
Figure 2-35. Add/Remove Properties Window
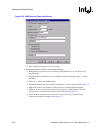
5. Click OK. A confirmation message will appear stating that the RAID Software Suite has been
removed from your system.
6. Click OK to close the message box. You have successfully removed the RAID Software Suite.
7. Click on RAID Device Drivers and click the Add/Remove button.
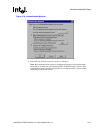
8. Click OK at the first confirmation prompt.
9. Click OK at the second confirmation prompt to uninstall the RAID device drivers. The system
will quickly prompt you to restart your system.Click OK .
10. Restart the system to complete the removal process.