


41
CONNECTIONS
PRINTING
PRECAUTIONS FEATURES
PREPARATION
OTHERS
TROUBLE-
SHOOTING
ADJUSTMENTS
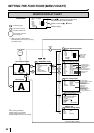
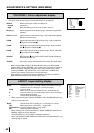
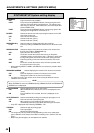
MODE Selects print mode
SAME Prints images of the same scenes on a sheet.
DIFF (Different) Prints images of different scenes on a sheet.
PHOTO1 Prints images in Photo mode.
• This menu is displayed only when MULTI : ON is selected.
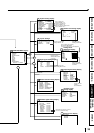
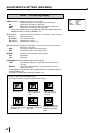
IMAGES Selects the number of images on a sheet. Is displayed when setting
MULTI to “ON”.
2 2-images on a sheet. (2 S-size images can be printed in L size print.
However, the top and bottom of the image will be clipped.)
2S 2 reduced images on a sheet. (For L size print, the image can be
printed without clipping by reducing S size images. In that case, the
printing speed(PRN SPEED) becomes NORMAL. For S size print, 2
images can be printed as the same result as 2 mode.)
4 4-images on a sheet
16 16-images on a sheet
• 2S is not displayed when selecting THERMAL:ON.
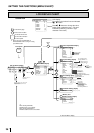
• When selecting “MODE:PHOTO1”, the following sizes are available.
CARD Print size 20 mm x 15 mm
3*4 Print size 30 mm x 40 mm
5*5 Print size 50 mm x 50 mm
3*3.5 Print size 30 mm x 35 mm
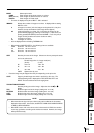
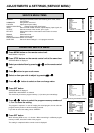
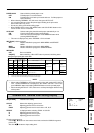
SIZE Sets the print area of the image. Choose one from 3 preset print areas
and a user select area.
Printed image size of 1 image mode(mm)
(S size) (L size)
W 100 x 75 125 x 94
M 94 x 70 118 x 89
N 90 x 68 113 x 85
USER Optional size by user
• Part of the image may be clipped from the print depending on the print size.
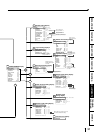
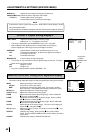
COPY Copys a printed image size which is set W, M, or N in size. The
selected setting level is displayed as TOP, BOTTOM, LEFT and
RIGHT. These levels become the changing base.
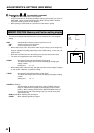
TOP/BOTTOM/LEFT/RIGHT
Sets the printing area of the image. Adjust the size with or
button.
TOP Shifts the upper end of the image (setting area : 0 to -48)
BOTTOM Shifts the lower end of the image (setting area : 0 to -48)
LEFT Shifts the left end of the image (setting area : 0 to -63)
RIGHT Shifts the right end of the image (setting area : 0 to -63)
NOTE
• When monochrome signal is input, colours may not be added to the characters
displayed on the monitor. In that case, set SELECT of ANALOG COLOR ADJ MENU
to “B&W” in SERVICE MENU.
• When SIZE is set to “W” or the minus value is increased on H-POSI, the monitor
screen may get darker according to the monitor connected. However, the image
will be printed correctly.