Chapter 5: FaxFinder-IP Operation
Multi-Tech Systems, Inc. FF240-IP Admin User Guide 77
Sending Faxes
Sending faxes through the FF240-IP is quick and simple and offers a variety of methods that can be used
to accomplish this. This section will show all the possible ways to send a fax with the FF240-IP.
Depending on how your administrator has set up the unit, several or even all options may be available.
First, the FF240-IP Schedule Fax window will be explained as it is used for the majority of faxing through
the FF240-IP unit.
The Schedule Fax Screen (New Fax)
The FF240-IP Schedule Fax screen appears (a) when you double-click an item from the Print Capture tab
of the client, or (b) when you select the New Fax command from the File menu of the Client Software
screen or (c) when you Right-click an item in the Print Capture tab and select ‘Fax.’
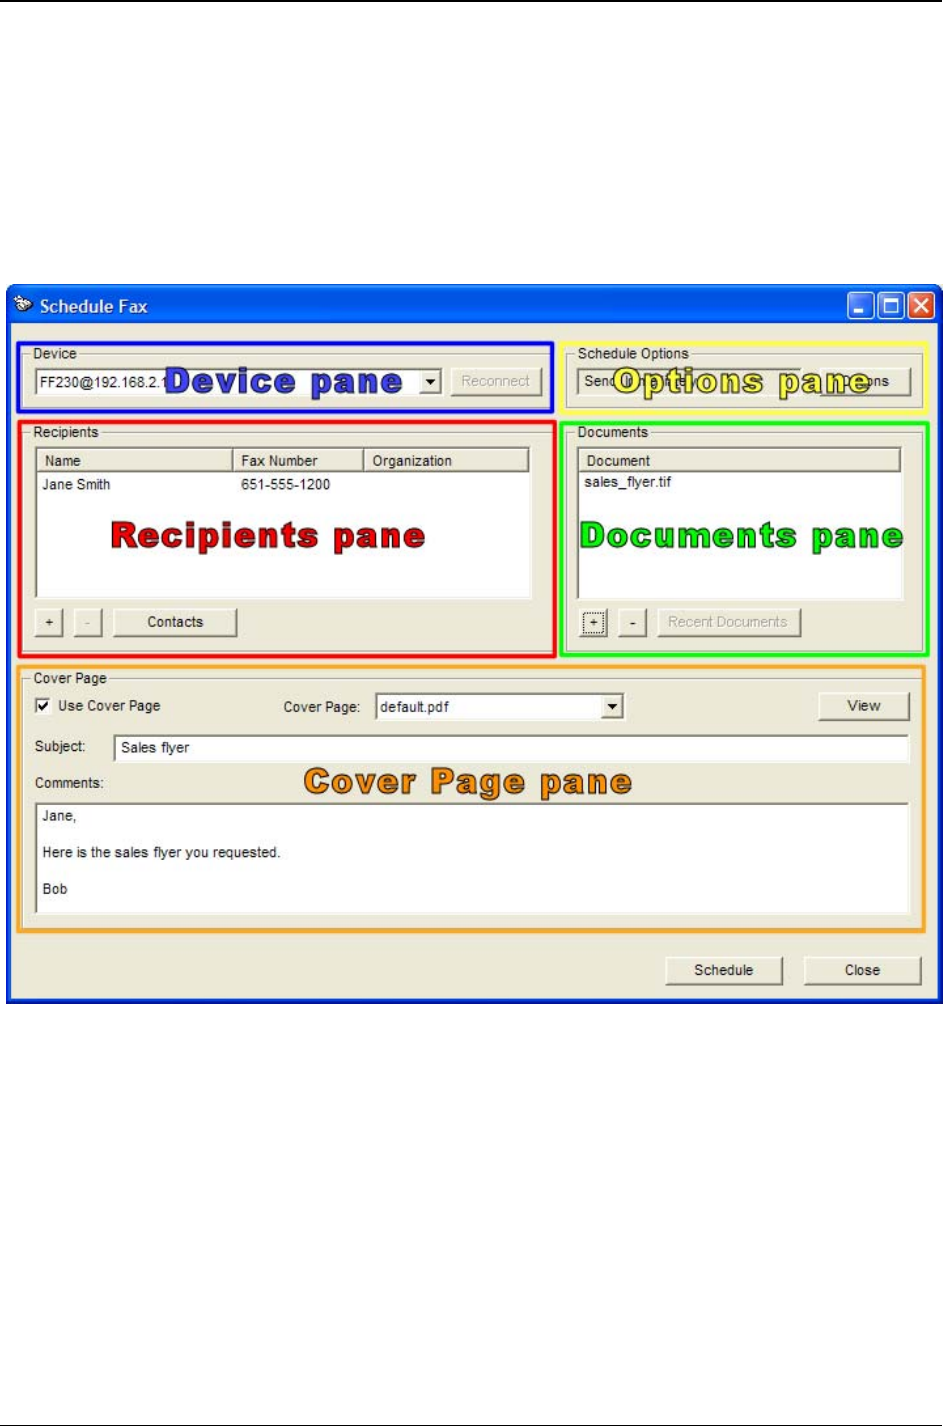
There are four sections (called ‘panes’ hereafter) to the Fax Scheduler: the Recipients pane, the
Documents pane, the Options pane and the Cover Page pane. At the bottom are the two main function
buttons – one to send or schedule the fax and the other to cancel it entirely.
Device pane
The
device pane provides a drop-down list of all FF240-IP units available to this client. Select the unit
that you want this fax sent from.
Reconnect button
If you have multiple FF240-IP units available and the
unit you want to use is not selected, select
the FF240-IP you want to send through and click the Reconnect button.
