


Chapter 4: SmartNAVI
69
Changing Network Settings
To change your network settings:
1. Go to the Main Window.
2. Click the NAS Management icon.
3. Click the Network Setting button.
4. Choose Automatic (DHCP) or Manual network settings.
If you chose Manual settings, type entries for each of the following
parameters in the fields provided:
• Computer (NAS system) Name
• IP Address
• Subnet Mask
• Gateway
• Primary and Secondary DNS – optional
5. Click the OK button.
6. Click the Yes button in the Network Setup box.
7. Click the OK button in the Information box.
The Main Window closes and the MSN Window opens.
8. Click your system in the NAS List.
The Main Window reopens.
Note
When you create your RAID volume in PASM, you can choose
additional options, such as Multiple RAID volumes.
See “Setting up SmartStor with the Setup Wizard” on page 83.
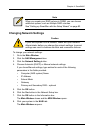
Caution
If your NAS system is on a network, check with your Network
Administrator before you change the network settings. Incorrect
settings can result in address conflicts and connection failures.