2-4 Netra CP3260 Blade Server User’s Guide • April 2009
■ Facility power loading specifications can support the rack or enclosure
requirements.
■ Your enclosure specifications support the cooling airflow requirements. The Netra
CP3260 blade server fits a standard ATCA shelf or chassis. If your installation
requirements are different, contact your field application engineer.
2.4 Installation Procedure Summary
The procedure in this section summarizes the Netra CP3260 blade server installation
at a high level. Be sure to read the details in Section 2.5, “Configuring On-Board
Hardware” on page 2-5 before installing the blade server.
The procedure to set up and configure a Netra CP3260 blade server in a system
includes the following actions:
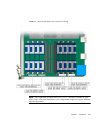
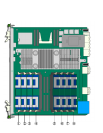
1. Configure the on-board physical hardware. For example, add memory or optional
Compact Flash.
2. Configure and install a rear transition module (RTM), if necessary.
3. Physically install the Netra CP3260 blade server into the chassis.
4. Connect the nodes to a local network. Alternatively, the blade server can be run as
a standalone system without a network connection.
5. Install the operating system and patches, as necessary. See Section 3.1, “Operating
Systems and Patches” on page 3-1.
6. Download firmware updates, if needed. See Section 3.4, “Firmware Updates” on
page 3-8.
7. Configure the operating system for 1-GbE or 10-GbE Ethernet switches. See
Section 3.5, “Configuring for 1-GbE or 10-GbE Switches” on page 3-8


