


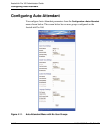

Configuring Auto-Attendant
41-001190-02 Rev. 01, Rel. 1.2 4-119
Configuring AastraLink Pro 160 System and Network Parameters
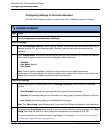
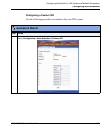
19 To upload a Main Menu announcement file, do the following:
• Click on <Browse> for the “Upload Menu” field.
Browse to the location on the server where the .wav file is stored, that contains the Main Menu you
want the Auto-Attendant to use. Click <Open>. The file you selected is uploaded to the AastraLink
Pro.
20 Click <Save> to save your changes.
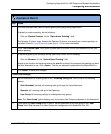
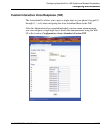
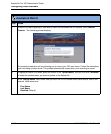
Custom Key Message
21 In the "Select Language" field, select the language for which you want to modify the Custom Key
Message. Valid values are: English, French, and Spanish (default is English).
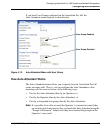
22 The Auto-Attendant has a built in default key message that plays using the system language.
To specify a custom key message using English, French, and Spanish, do the following:
• Click on <Record Custom> for the “Custom Key Message” field.
The Operator IP phone rings. Answer the Operator IP phone, and record your custom Key Message
in each of the languages required (English, French, Spanish), as prompted. Refer to Custom
Recordings on page 4-134 for more information.
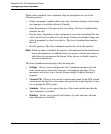
23 In the “Use English Message”, “Use French Message”, and/or “Use Spanish Message” field(s),
place a check mark in the box for the Auto-Attendant to use the custom Key Messages you recorded.
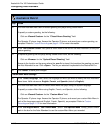
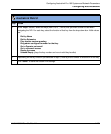
24 To upload a Key Message announcement file, do the following:
• Click on <Browse> for the “Upload Key Message” field.
Browse to the location on the server where the .wav file is stored, that contains the Key Message you
want the Auto-Attendant to use. Click <Open>. The file you selected is uploaded to the AastraLink
Pro.
25 Click <Save> to save your changes.
AastraLink Web UI
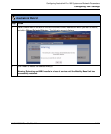
Step Action