Chapter 8 Working with Users and Groups 101
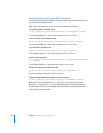
Important: Pick a user ID that isn’t on either list and that is greater than 501. 501 is the
user ID of the local administrator user that gets created when you install Mac OS X
Server.
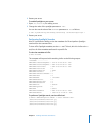
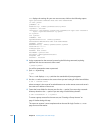
2 Start the dscl tool in interactive mode, specifying the computer you are using as the
source of directory service data. Use the dscl tool to create a nonadministrator user
account.
$ dscl localhost
>
In interactive mode, the dscl tool displays the current folder in the directory domain
(not the current folder in the file system) and a “>” character as a prompt.
3 Change the current folder to /LDAPv3/ipaddress/Users by entering the path at the
prompt:
> cd /LDAPv3/
ipaddress
/Users
Replace ipaddress with the IP address of your directory server. If using a NetInfo
directory domain, enter cd /NetInfo/root/Users at the prompt.
4 Authenticate as an administrator by entering the following command, replacing
adminusername with your administrator user name, and entering your administrator
password when prompted:
> auth
adminusername
5 Create a new user account, replacing ajohnson with the new user account’s short name
and specifying the path to the new user’s home folder in /Users/:
> create
ajohnson
HomeDirectory “<home_dir><url>afp://sp.apple.com/Users
</url><path>
ajohnson
</path></home_dir>”
> create
ajohnson
NFSHomeDirectory /Network/Servers/sp.apple.com/Users/
ajohnson
Replace sp.apple.com with your home folder server’s location.
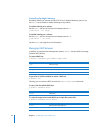
6 Specify the new user’s default UNIX shell:
> create
ajohnson
UserShell /bin/bash
7 Specify the user ID, replacing 1234 with the new user’s ID:
> create
ajohnson
UniqueID
1234
8 Specify the long name for the new user account, replacing Anne Johnson with the
actual long name:
> create
ajohnson
RealName "
Anne Johnson
"
9 Review the settings of your new user account by entering the following command,
replacing ajohnson with the new user account’s short name as before:
> read
ajohnson


