Installation and Set-up
Page 2-8
5 Place the unit in the equipment rack.
▲ Important! When fully loaded, the IntraChassis 9000
can weigh over 100 lbs. Use proper lifting equipment
and techniques, as described in “Lifting the Chassis
Safely” earlier in this chapter, to prevent back and other
injuries.
6 Secure the unit by screwing its mounting brackets to the
equipment rack. Use a minimum of six {right?} screws for
this purpose.
▲ Important! Make sure the unit is supported until all
the mounting screws for each bracket are secured to the
equipment rack. Failure to do so could cause the unit to
fall, resulting in personal injury or damage to the unit,
or both.
7 Proceed to the “Cable Guide Installation” section.
Free-Standing/Desktop Installation of the Chassis
The IntraChassis 9000 chassis has four rubber feet on the bottom of the chassis
that allow for free-standing installation of the unit.
For free-standing/desktop placement:
1 Attach the four rubber pads (supplied) to the bottom of
each corner of the IntraChassis 9000 chassis.
2 Place the unit on a flat surface with a minimum area of
17.1” x 13.5” (434.3 mm x 342.9 mm) and support capac-
ity of 150 lbs (68.2 kg).
3 Make sure there is enough ventilation space between the
IntraChassis 9000 and surrounding objects.
4 Proceed to “Cable Guide Installation” below.
Cable Guide Installation
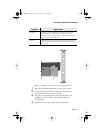
Before installing any of the modules in your IntraChassis 9000, place the cable
guide hook units on each side of the front panel and attach them with the
screws provided. Make sure you install the guides in such a way that the hooks
open upward.
GLXY9.book Page 8 Thursday, February 17, 2000 3:04 PM


