Basic Printing
17
(2) Connect the printer to your computer with a USB cable.
(3) Open the Paper Support, turn on the printer, and then turn on the computer.
2 Start the Canon iP90 Setup Utility.
3 Specify the paper size and layout.
Changing the Photo Print Settings
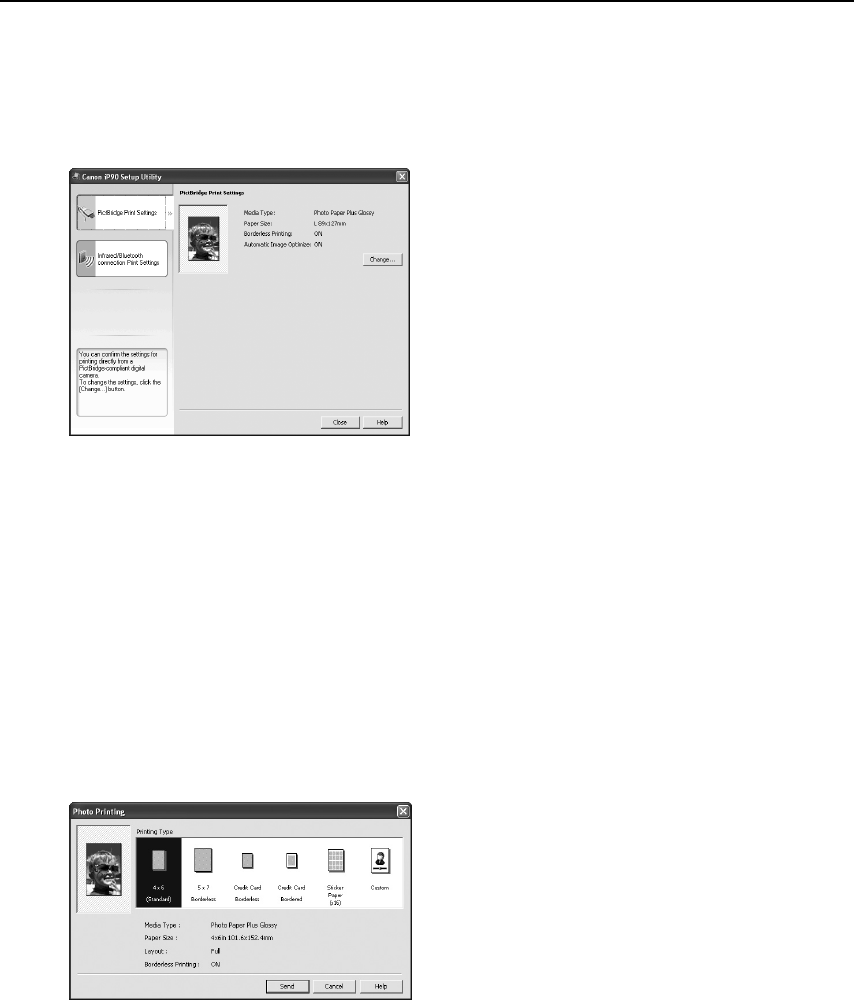
(1) Click Infrared/Bluetooth connection Print Settings
Infrared/Bluetooth connection Print SettingsInfrared/Bluetooth connection Print Settings
Infrared/Bluetooth connection Print Settings tab.
(2) Click Change
ChangeChange
Change on Photo Print Settings
Photo Print SettingsPhoto Print Settings
Photo Print Settings.
The Photo Printing
Photo PrintingPhoto Printing
Photo Printing dialog box appears.
n
ows
W
n
owsW
n
ows
n
ows
Click Start
StartStart
Start and select All Programs
All ProgramsAll Programs
All Programs (or
Programs
ProgramsPrograms
Programs), Canon Utilities
Canon UtilitiesCanon Utilities
Canon Utilities, Canon iP90
Canon iP90 Canon iP90
Canon iP90
Setup Utility
Setup UtilitySetup Utility
Setup Utility and Canon iP90 Setup Utility
Canon iP90 Setup UtilityCanon iP90 Setup Utility
Canon iP90 Setup Utility.
The Canon iP90 Setup Utility
Canon iP90 Setup UtilityCanon iP90 Setup Utility
Canon iP90 Setup Utility screen
appears.
Macintosh
MacintoshMacintosh
Macintosh
Open the Applications
ApplicationsApplications
Applications folder, and then
double-click the Canon iP90 Setup Utility
Canon iP90 Setup UtilityCanon iP90 Setup Utility
Canon iP90 Setup Utility
folder and the Canon iP90 Setup Utility
Canon iP90 Setup UtilityCanon iP90 Setup Utility
Canon iP90 Setup Utility
icon.
The Canon iP90 Setup Utility
Canon iP90 Setup UtilityCanon iP90 Setup Utility
Canon iP90 Setup Utility screen
appears.
*Windows XP SP2 is used as an example
here.
The same operation is applicable in
Macintosh.
iP90_QSG_US.book Page 17 Thursday, December 7, 2006 11:03 AM


