


Printing Maintenance
64
Resetting the Ink Counter
When an ink tank is replaced, the ink counter must be reset.
The low ink warning is only displayed properly if the ink counter is reset.
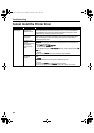
Message Prompting Confirmation of Ink Tank Replacement
If an ink tank is removed, the printer will send a message prompting you to confirm
replacement of the ink tank at the start of the next print job.
When an ink tank has been replaced, follow the procedure below to reset the ink
counter. The low ink warning is only displayed properly if the ink counter is reset.
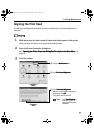
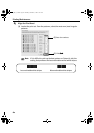
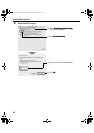
1 Check the message, and click Yes.
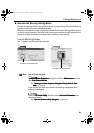
Mistakenly clicking No
NoNo
No, instead, will prevent the low ink warning from functioning
properly. If this happens, be sure to open the driver’s Properties dialog box and
manually reset the ink tank counter in the Maintenance tab.
See "Resetting the Ink Counter in the Printer Properties dialog box
Resetting the Ink Counter in the Printer Properties dialog boxResetting the Ink Counter in the Printer Properties dialog box
Resetting the Ink Counter in the Printer Properties dialog box" on page 65
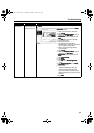
2 Select the replaced ink tank, and click OK.
The dialog box allows you to select the replaced ink tank.
When both black and color ink tanks have been replaced, select both Black and
Color.
If you have not replaced the ink tank with a new one, click Cancel
CancelCancel
Cancel.
Important If infrared communication is performed in Windows XP or Windows 2000,
the printer will not send the message asking for confirmation of ink tank
replacement.
This is why it is important to open the printer driver's Properties dialog box
and manually reset the ink tank counter in the Maintenance tab whenever
an ink tank is replaced.
iP90_QSG_US.book Page 64 Thursday, December 7, 2006 11:03 AM