


3-8
Catalyst 2960 Switch Hardware Installation Guide
OL-7075-05
Chapter 3 Switch Installation (8-Port Switches)
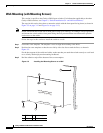
Installing the Switch
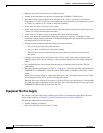
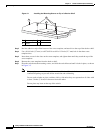
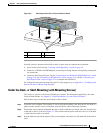
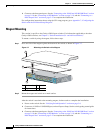
Figure 3-1 Installing the Mounting Screws on Top of a Desk or Shelf
Step 3 Peel the adhesive strip off the bottom of the screw template, and attach it to the top of the desk or shelf.
Step 4 Use a 0.144-inch (3.7 mm) or a #27 drill bit to drill a 1/2-inch (12.7 mm) hole in the three screw
template
slots.
Step 5 Insert three screws in the slots on the screw template, and tighten them until they touch the top of the
screw template.
Step 6 Remove the screw template from the desk or shelf.
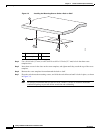
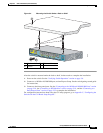
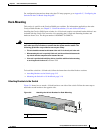
Step 7 Place the switch onto the mounting screws, and slide the switch forward until it locks in place, as shown
in
Figure 3-2.
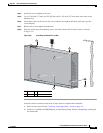
Note We strongly recommend that you allow at least 3 inches (7.6 cm) of clearance around the
ventilation openings to prevent airflow restriction and overheating.
Do not stack switches or place switches side-by-side unless they are separated on all sides with
at least 3
inches (7.6 cm) of clearance from each other.
Do not place any items on the top of the switch.
1 Screw template 3 Desk or shelf
2 Screws
1
3
2
210096