


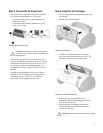

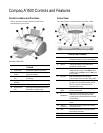
13
Common Procedures
This section describes several common procedures that
you will need to operate your Compaq A1500. These
procedures include:
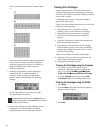
• Using the A1500 Monitor Program
• Using the A1500 Settings Utility to set up Print, Fax,
Copy and Scan operations including Speed Send and
Control Form
• Changing Default Settings
• Setting the date and time
• Printing reports
• Changing, aligning, and cleaning print cartridges
• Installing and using the photo cartridge
• Loading different sized paper
• Printing on envelopes
• Calibrating the scanner
• Using the SETUP button on the control panel
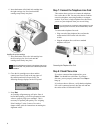
Using the A1500 Monitor Program
The A1500 can only get assistance from the PC to run PC
assisted tasks when the A1500 Monitor Program is
running.
The following A1500 tasks require PC assistance:
• Speed Send operations that include email addresses
and destinations
• All scan operations
• Control Form jobs
For more details on using these procedures, go to the
appropriate chapter in this guide; for example, Faxing,
Copying or Scanning.
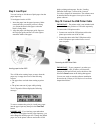
It is not necessary to have the A1500 Monitor Program running
for any Print, Copy, or Scan operations initiated from your PC.
Once the printer is powered and connected to the PC by
the USB cable and the software is installed, the A1500
monitor program will start running when the system is
powered up. When the A1500 Monitor Program is
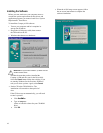
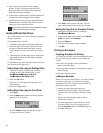
running, the following icon will appear in the system tray.
If a PC assisted task is in progress, the icon is animated.
While your cursor is over the icon, click the left mouse
button to bring up the A1500 Settings utility. For more
details on using the utility, see “Compaq A1500 Settings
Utility” later in this chapter.
Right click on the icon to display the Monitor menu.
From the menu, you can access the Settings Utility, the
Printer Control Program, or the Printer Properties. You
can also choose to shut down the A1500 Monitor
Program. This is useful if you want to disable the A1500
from using the host PC.
If the A1500 is not connected or there is a communication
problem, a red ‘X’ will appear on the above icon.