


14
Changing Default Settings
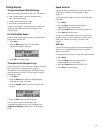
The computer-based Compaq A1500 Settings Utility
provides a simple user interface to change and set up the
following features of the A1500:
• Print
• Fax
• Copy
• Scan
• Speed Send
• Compaq Control Form
To access the A1500 Settings Utility, use either of the
following methods:
• Click Start
Programs
Compaq A1500 All-In-
One
Compaq A1500 Settings Utility.
-or-
• Left click on the A1500 Monitor Program icon located
in the system tray.
For more details on the default settings, see the “Compaq
A1500 Settings Utility” section later in this chapter.
Stand Alone Operation
When the A1500 is not connected to a computer, or the
computer is not on, the A1500 can perform the following
tasks:
• Send and receive faxes.
• Make black and white or color copies
• Support the following setup functions:
Change, clean and align the cartridges
Print reports
Change the receive mode
Select paper size and fax receive print quality
For more details on using these procedures, go to the
appropriate chapter in this guide; for example, Faxing,
Copying, Scanning and “Control Panel Setup Button.”
If you attempt a task that requires the PC while the PC is not
available, the A1500 will display a “PC not available” message.
Setting the Date and Time
A blinking date and time in the LCD panel will indicate
that there has been a power failure. If power is lost for
more than an hour, the correct time will be lost.
When the PC is connected it can automatically detect this
condition and reset the date and time for you.
The date and time can be set from the computer using the
Compaq A1500 Settings Utility or from the A1500
control panel.
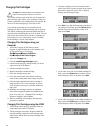
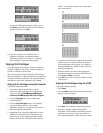
Setting the Date and Time using the Settings
Utility
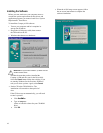
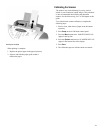
To change the date and time from the computer:
1. Run the Compaq A1500 Settings Utility by
clicking on the A1500 Monitor icon.
2. Select the Fax button.
3. Select the Advanced button.
4. Select the check box to “Get date and time from
the computer.” Alternately, if this box is not
checked, you can enter the date and time.
5. Close the Settings Utility to update the time on the
A1500 display.
Setting the Date and Time using the A1500
You can set the date and time from the A1500 control
panel when the A1500 is used in standalone mode, using
the following steps:
1. Press the Setup button. Date and time is the first
menu item in the Setup menu.
2. Enter two digits for the month. For example, enter
01 for January. Note that as you enter valid
information, the top line displays the updated date
and time.
3. Enter two digits for the day. For example, enter 07
for the 7
th
.
4. Enter two digits for the year. For example, enter 00
for 2000, or 01 for 2001.
5. Enter two digits for the hour. For example, enter
02 for 2 PM.
6. Enter two digits for the minute. For example, enter
45.
7. Enter 1 for AM or 2 for PM.
You can also use the Options button on the A1500 to step
through or skip over the current settings. If you only want
to change the hour, press the Options button until the hour
is displayed and then enter the new hour. Pressing Stop at
any time uses the last valid date and time entered.