4
Step 2: Choose a Location for the A1500
To help guarantee trouble-free operation of your
A1500, place it on a flat, stable surface. Leave enough
space behind and in front of the A1500 to allow for
easy paper loading, document removal, and for
opening the control panel.
!
CAUTION: Do not place the A1500 in direct sunlight, near heat
sources or air conditioners or in dusty or dirty environments.
Step 3: Prepare the A1500 for Use
When you take the A1500 out of the box, note that it
was packaged to protect it during shipping. Before you
use the A1500, make certain that you remove all of the
following items:
• Tape
• Packing materials
!
CAUTION: For instructions on removing the packing material, see the
Compaq A1500 All-In-One setup poster.
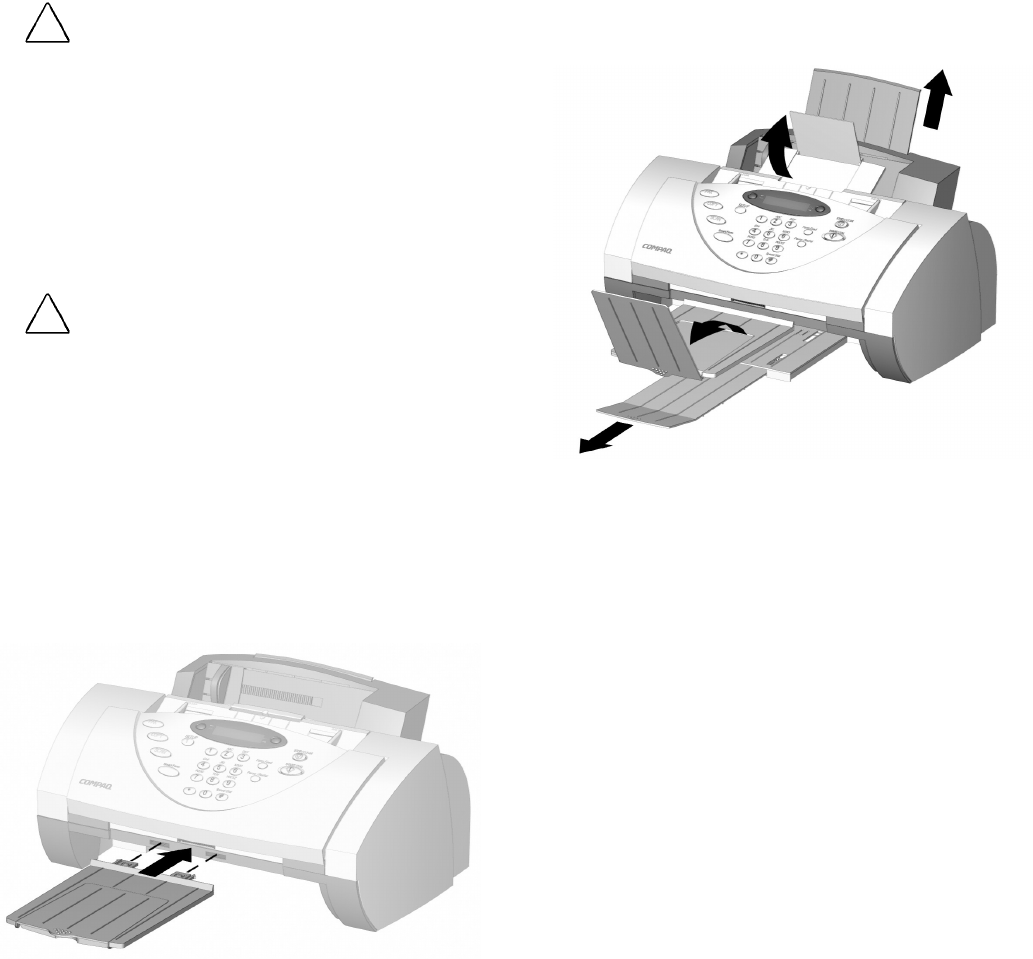
Step 4: Set Up the Document Trays
The A1500 uses several trays to support your paper
documents.
Document Exit Tray
To install the document exit tray:
1. Align the latches on the tray with the slots on
the front of the All-In-One.
2. Slide the tray latches into the appropriate slots
until the latches lock into place.
Installing the document exit tray
Extend the Document Trays
The A1500 ships with the document input/exit tray
already installed.
To support documents before and after printing,
faxing, copying or scanning, remove the packing tape
and extend all of the trays by pulling up and unfolding
the extensions.
The A1500 appears as illustrated:
Extending the paper trays


