5
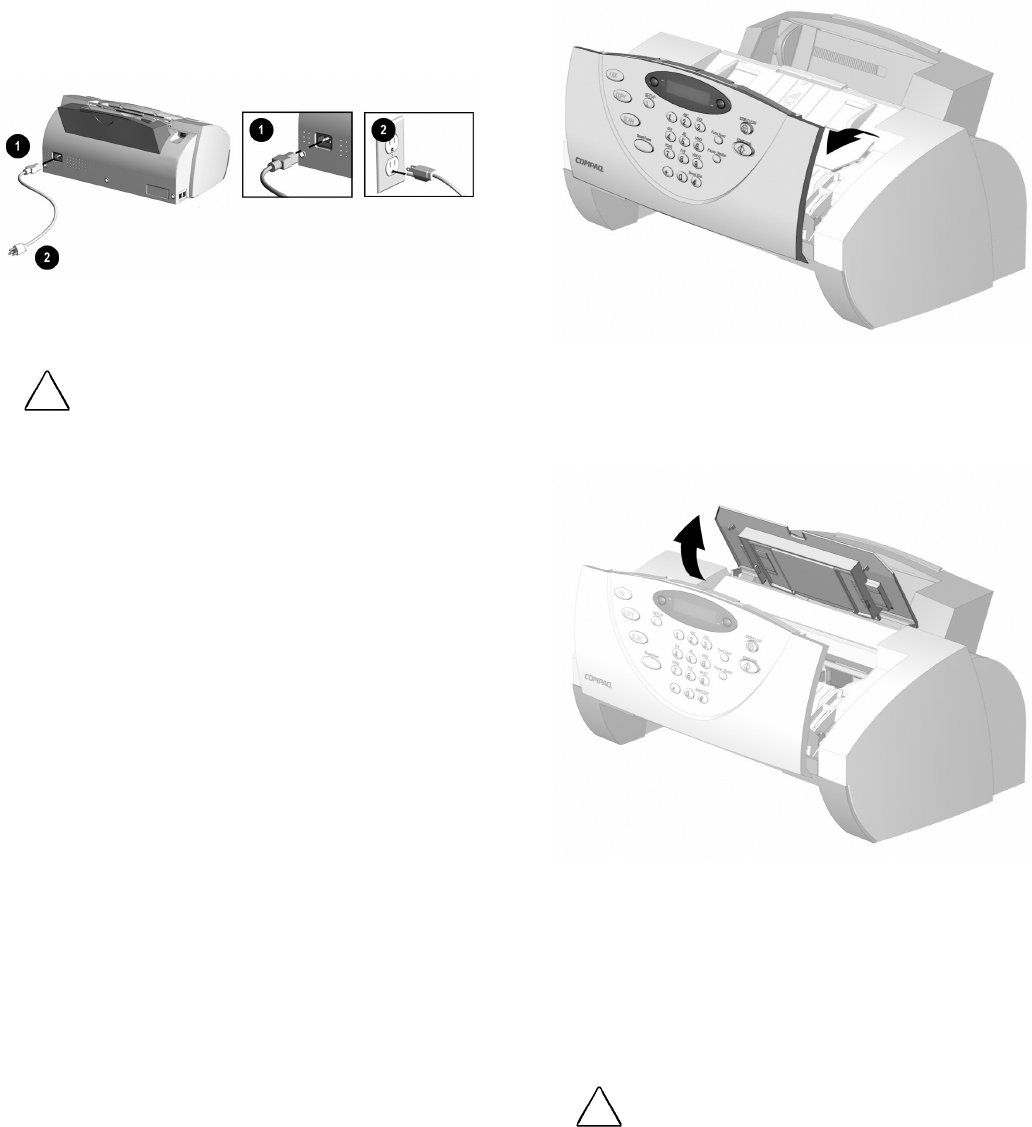
Step 5: Connect the AC Power Cord
This section shows you how to connect the A1500 to
the electrical outlet using the AC power cord.
1. Connect one end of the AC power cord into the
back of the A1500.
2. Connect the other end into a standard AC power
outlet (120V, 60Hz).
Connecting the AC Power Cord
!
CAUTION: Make certain that you plug the cord into a grounded
(three-prong) wall outlet. Using an outlet that is not grounded may
damage the A1500.
After you have plugged in the A1500, the date and
time may be blinking on the display. Your PC sets and
maintains the date and time for you. However, if you
are using the A1500 as a standalone machine, see
“Setting Date and Time” in the Common Procedures
chapter.
Compaq recommends that you leave the A1500 on
at all times. The A1500 goes into an energy saving
mode when not in use. However, if you want to
turn off the A1500, unplug the power cord.
Step 6: Install the Ink Cartridges
1. Lift the control panel by grabbing the panel along
the top edge.
2. Pull the control panel forward.
Lifting the control panel
3. Lift the ink cartridge access door. For better
access, stow the document input tray away. The
cartridge carriage will move to the center.
Lifting the ink cartridge access door
4. Remove the new ink cartridge from its
packaging. Hold the ink cartridge by the black
areas or colored top only.
5. Remove the tape covering the print head by
carefully pulling on the yellow tab. Be sure to
remove all of the tape.
!
CAUTION: Do not touch the gold contact area of the print cartridge.


