


45
Scanning
Scanning Overview
The Compaq A1500 All-In-One offers three ways to
scan a document. You can scan:
• Using the control panel of the A1500
• Using the Compaq Control Form
• Using the computer
The driver supports scanning from the bundled
applications as well as all your favorite computer
programs.
Preparing Documents for Scanning
You can use the A1500 to scan documents that are
printed on standard letter, legal, or A4-sized paper.
Follow these guidelines to prepare your documents.
• Removing all staples, paper clips, and similar
items before feeding the document.
• Making sure any glue, ink, or correction fluid on
the paper is completely dry before feeding the
document.
Using the Copy/Scan Sleeve
Some documents cannot be fed into the scanner input
feeder. For those documents, the A1500 comes with a
Copy/Scan Sleeve. The sleeve is a stiff piece of plastic
with a clear plastic overlay. Simply place your
document between the two pieces of plastic so that
your document is centered at the top and visible
through the clear plastic sheet.
Use the Copy/Scan Sleeve for the following types of
documents:
• Envelopes
• Checks
• Receipts
• Fragile or thin documents
• Photographs
• Wrinkled or creased paper
• Curled or rolled paper
• Torn paper
• Carbon or carbon-backed paper
• Coated or glossy paper
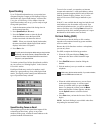
!
CAUTION: Do not feed anything thicker than a normal sheet of paper
into the scanner, even if you use the Copy/Scan Sleeve. You cannot
scan credit cards, a driver’s license, etc. Doing so will damage your
sleeve and the A1500.
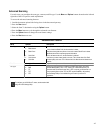
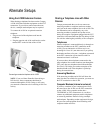
Loading the Documents
1. Place the document(s) to be scanned face
down and top down in the document input
tray. If you are using the Copy/Scan Sleeve,
place it top down (the top is the closed end)
and clear side down.
2. Adjust the document guides to match the width
of the document, if necessary.
3. Slide the document down into the tray until the
machine grips the first sheet. The LCD panel
displays the DOCUMENT LOADED message:
Scanning
To perform a scan, complete the following steps.
1. Slide document into the tray until the machine
grips the first sheet. The lower LCD panel
displays the message DOCUMENT LOADED:
2. Press the Scan button.
3. Select the SCAN TO destination. Use the Options
button to cycle through the available choices.
4. Press Start.
The All-In-One will then contact your computer and
scan all the documents in the document input tray to
the chosen destination.
Scan to a Folder
The first Scan To destination is your User Folder. This
is initially your My Pictures folder, located in your My
Documents directory. You can change your user folder
and default file type with the Settings Utility.
Simply press the Scan button twice to scan all documents to
your User Directory, using the settings you selected with the
Settings Utility.
Scan to Email
The second Scan To menu destination is Scan To
Email. This option will scan documents directly into
your email program, and either convert the document
to text for editing, or attach the documents as graphic
images.