


108 Installing Upgrades
www.dell.com | support.dell.com
NOTICE: If you are
not
installing a microprocessor upgrade kit from Dell,
reuse the original heat sink and securing clips when replacing the
microprocessor.
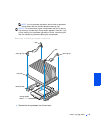
a Remove the film covering the thermal grease on the bottom of the
heat sink.
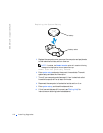
b Lower the heat sink to the microprocessor so that the heat sink fits
in the heat sink retention base.
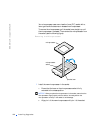
c For each of the replacement metal clips that secure the heat sink
to the microprocessor, fit the end of the clip that does not have the
latch to the heat sink retention base. Then, press down on the
clip’s latch to secure the clip to the heat sink retention base (see
"Removing the Microprocessor Heat Sink").
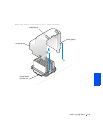
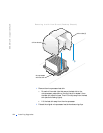
9 Replace the airflow shroud.
10 Rotate the power supply back into position, making sure that the
securing tab snaps into place.
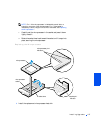
11 Replace the computer cover, reconnect the computer and peripherals
to their electrical outlets, and turn them on.
NOTE: If enabled, the Chassis Intrusion option will cause the following
message to be displayed at the next system start-up:
ALERT! Cover was previously removed.
12
Enter system setup, and confirm that the top line in the System Data
area correctly identifies the new microprocessor. Also, confirm that the
values under the CPU Information menu are correct for the new
microprocessor.
13 Exit system setup, and then run the Dell Diagnostics to verify that the
new microprocessor is operating properly.
System Battery
The 3.0-V CR2032 coin-cell battery installed on the system board provides
power to retain the configuration, date, and time information when the
system is turned off. The system battery is designed to provide years of
service without being replaced. However, you may need to replace the
battery if configuration or clock-related inconsistencies occur or if one of
the following messages is displayed during the boot routine: