


70 Installing Upgrades
www.dell.com | support.dell.com
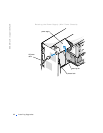
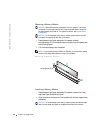
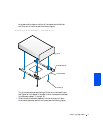
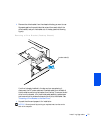
Removing a Drive Bracket (Mini Tower Chassis)
If a drive is already installed in the bay and you are replacing it,
disconnect the DC power cable and interface cable from the back of
the drive before removing the bracket from the bay. To remove the old
drive from the bracket, turn the drive/bracket assembly upside down
and remove the four screws that secure the drive to the bracket (see
"Attaching a Drive Bracket to the New Drive").
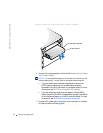
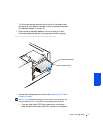
5 Unpack the drive and prepare it for installation.
NOTICE: Ground yourself by touching an unpainted metal surface on the
back of the computer.
See the documentation that accompanied the drive to verify that the
drive is configured for your computer. Change any settings necessary
for your configuration.
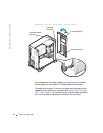
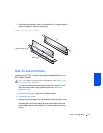
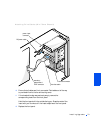
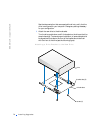
6 Attach the new drive to the drive bracket.
Turn the drive upside down, and fit the bracket on the drive so that the
screw holes align. To ensure proper installation, all screw holes should
bracket tabs (2)