


Remove and Replace Procedures
5-33
5
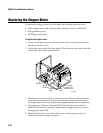
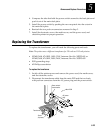
4. Compress the tabs that hold the power switch secured to the back plate and
push it out of the main deck plate.
5. Install the power switch by pushing the new receptacle into the cutout in
the main deck plate.
6. Reattach the two push-on connectors removed in Step 3.
7. Install the electronics cover, the media cover, and the power cord, and
check the printer for proper operation.
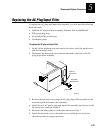
Replacing the Transformer
To replace the transformer, you will need the following parts and tools:
Note: The printer uses a different transformer for 220-volt and 115-volt printers.
• XFMR, 3600, 47-63HZ, 100V/120V, Intermec Part No. 585525-001 or
XFMR, 3600, 47-63HZ, 200V/240V, Intermec Part No. 585525-002
• ESD grounding strap
• #2 Phillips screwdriver
To replace the transformer
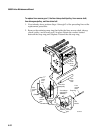
1. Switch off the printer power and remove the power cord, the media cover,
and the electronics cover.
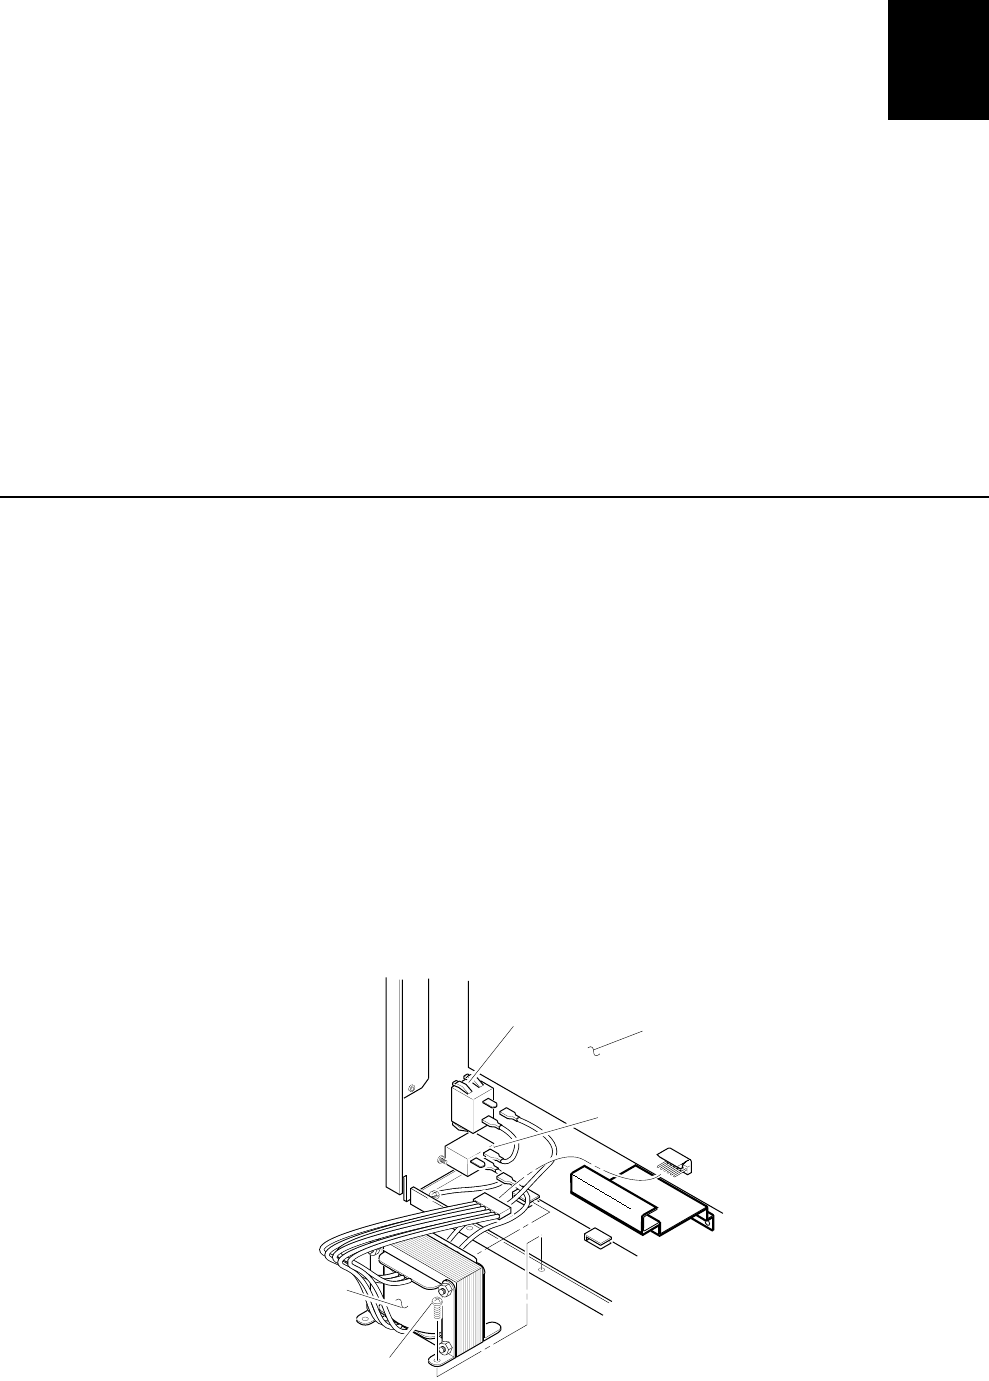
2. Disconnect the transformer cable from the main PCB and the two leads
with push-on connectors from the AC power plug and the power switch.
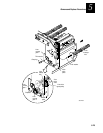
3600M.064
Power switch/
circut breaker
Transformer
AC power
plug
Screw
(2 places)
Main PCB