


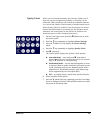


4-10 Manual Calibrations
Use a printer’s loupe or magnifying glass if the patterns are
difficult to see.
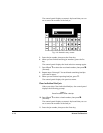
5. Press the , or ) control panel keys repeatedly until the num-
ber next to the pattern that is closest to aligned perfectly is
displayed.
For example, if pattern +1 is the closest aligned, press the ,
key to change the display to:
X REG
HEAD-1 +1
If a printhead is extremely out of alignment, there may be
no pattern in alignment. Since the black vertical bars are
five pixels apart, you can add +5 or -5 to a pattern number
to shift the colored bars up or down by one black bar. Alter-
natively, you can repeatedly perform the X calibration,
which will move the head in smaller increments, until the
head is aligned.
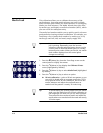
6. Press ! (Proceed).
The control panel message increments the head number by
one.
7. Repeat steps 4 through 6 for each of the heads.
When you have entered registration values for all of the pat-
terns, the control panel displays this message:
Registration successful.
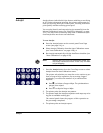
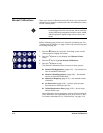
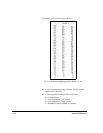
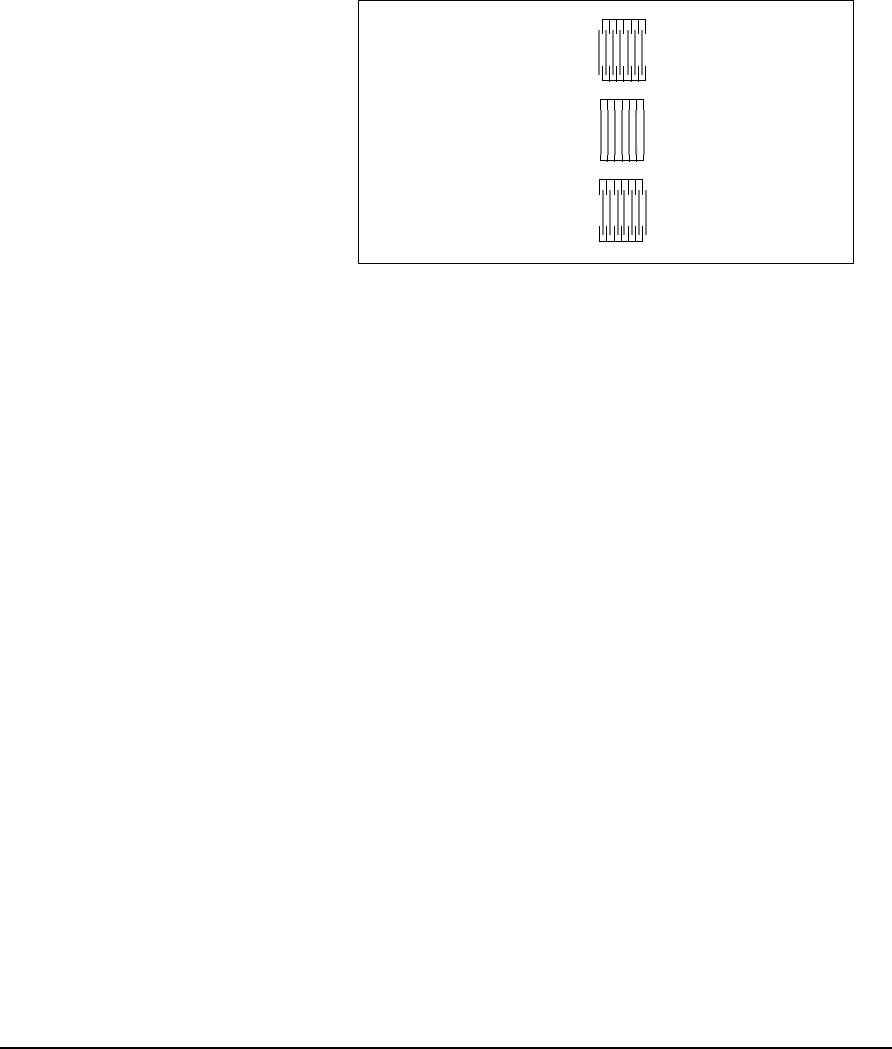
Fig. 4-1. Sample head calibration patterns.
In this example, pattern “+1” is aligned the closest,
so “+1” would be entered.
+1 +2
+0