


3-34 Loading Rigid Media
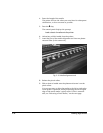
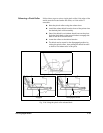
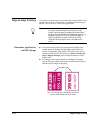
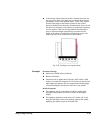
10. Push the media up against the media alignment tool.
Make sure that the media is centered under the pinch rollers.
Avoid positioning either the left or right edge of the media
under a pinch roller. The printer will automatically locate
the left and right edges.
Note
If the media is not square (opposite edges parallel
with 90 degree corners), you can align it with the
fence on the input (rear) table. First, ensure that the
fence is exactly perpendicular with (at 90 degrees to)
the platen with a large framing (carpenter’s) square
and the media alignment tool.
11. Set the pinch rollers as specified in the Media Wizard.
12. Remove the media alignment tool from the platen.
13. Press the ! key to continue.
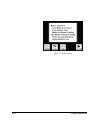
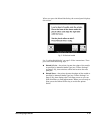
The control panel asks whether you want to adjust the head
height. If the thickness of the media you are loading is sig-
nificantly different from the previously loaded media, then
adjust the head height for optimal print quality and to pre-
vent the carriage from striking the media.
◆ If you press Yes, the control panel enters the head
height, service station height, and bidi calibration proce-
dures. (See Chapters 4 and 5 for instructions.)
◆ If you press No, the media load procedure continues.
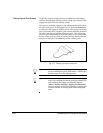
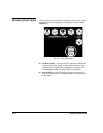
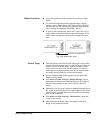
The printhead carriage moves out of the service station and
uses the onboard digital imaging sensor (“camera”) to locate
the right, front, and left edges of the media, and to deter-
mine whether the sheet was loaded squarely into the printer.
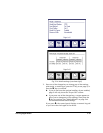
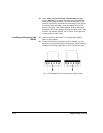
14. If the media is skewed, the control panel asks whether you
want to adjust it.
◆ If you press Yes, you can release the pinch rollers, adjust
the media, lower the pinch rollers, and press the Pro-
ceed key to continue.
◆ If you press No, the media load procedure continues.
The control panel briefly displays the measured width of the
media.