


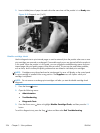

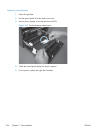

3. Press the Down arrow button to highlight the Paper Path Sensors option, and then press the
OK button.
4. Select Start Test. Press the Down arrow
button to see the test results.
NOTE: Exiting the Paper-path sensor test menu and then reentering it will clear the test values
from the previous test.
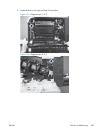
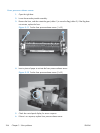
Viewing the sensor status before you activate the test should show that the sensors PS9, PS11 and
SW5 have already been activated. After running the Paper-path sensor test, sensor PS9 does not
show any activation status.
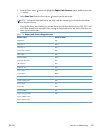
Table 3-6 Paper-path sensors diagnostic tests
Sensor name Sensor number
Registration SR8
Fuser loop 1 SR14
Fuser loop 2 SR15
Fuser pressure release SR7
Fuser output SR5
Duplexer refeed SR22
Developer alienation SR11
ITB alienation SR17
Output bin full SR6
Tray 1 paper SR21
Tray 2 paper SR20
Tray 2 Cassette Sensor SR13
Tray 2 Cassette Lifter SR9
Tray 3 paper SR3
Tray 3 feed SR4
Tray 3 installed SR1
Tray 3 size (top) button SW1
Tray 3 (middle) button
Tray 3 (bottom) button
ENWW
Tools for troubleshooting
259