


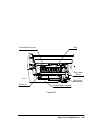


6-49Removal and Replacement
CUTTER ENCLOSURE ASSEMBLY REMOVAL
To remove the cutter enclosure assembly, perform the following procedure:
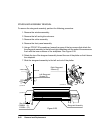
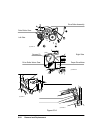
1. Using a TORX T-15 screwdriver, remove the screws that attach the front trim pieces
to the left and right sideplates. Remove the front trim pieces.
2. Remove the overdrive support assembly.
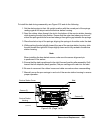
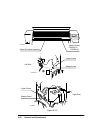
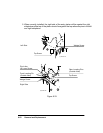
3. Using a TORX T-15 screwdriver, remove the upper of the two screws that attach the
left and right ends of the cutter enclosure assembly to the left and right sideplates.
See Figure 6-32.
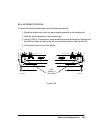
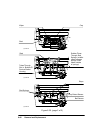
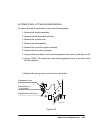
4. Using a TORX T-20 screwdriver, loosen the wedge screws at the left and right ends
of the cutter enclosure assembly out of the left and right sideplates until the screws
are flush with the inner side of the sideplates.
5. Pull the cutter enclosure assembly forward and clear of the plotter.
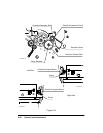
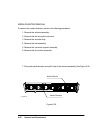
6. To remove the media guides from the cutter enclosure, grasp each one firmly, twist
counter-clockwise, and pull it clear of the enclosure.