


6-51Removal and Replacement
ENTRY PLATEN ASSEMBLY REMOVAL
To remove the entry platen assembly, perform the following procedure:
1. Remove the window assembly.
2. Remove the left and right endcovers.
3. Remove the electronics enclosure cover.
4. Disconnect the media sensor cable from the main PCA.
5. Disengage the media sensor cable from all clamps and remove the media sensor
from the entry platen.
6. Lower the rollfeed cover to the open position.
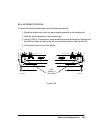
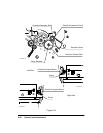
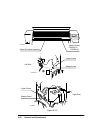
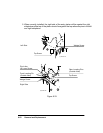
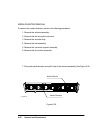
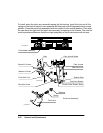
7. Using a TORX T-15 screwdriver, loosen the wedge screws that attach the entry plat-
en to the left and right sideplates until the screws are flush with the sideplates. See
Figure 6-33.
8. Using a TORX T-15 screwdriver, remove the screw that attaches the pinch-wheel lift
mechanism lever to the right sideplate and remove the lever.
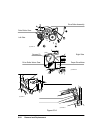
9. Using a TORX T-15 screwdriver, remove the screws that attach the front trim pieces
to the left and right sideplates. Remove the front trim pieces.
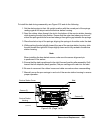
10. Remove the cutter enclosure assembly.
11. Using a TORX T-15 screwdriver, remove the top screw that attaches the entry plat-
en to the right sideplate.
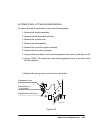
12. Pull the entry platen down, forward and clear of the plotter.
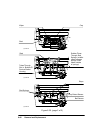
To install the entry platen, do the following:
1. Install the entry platen such that the back of the platen rests on the back pins.
2. Loosely install the left and right wedge screws.
3. Install the screw that attaches the entry platen to the right sideplate.
4. Tighten the left and right wedge screws.