


6-15Removal and Replacement
ENDCOVERS (LEFT AND RIGHT) REMOVAL
To remove the endcovers, perform the following procedure:
1. Raise the plotter window to the open position.
2. Remove the window assembly.
3. Lower the rollfeed cover to the open position.
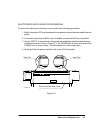
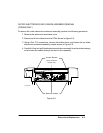
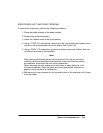
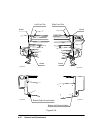
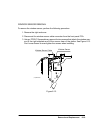
4. Using a TORX T-15 screwdriver, remove the two front screws that connect each
endcover and front sideplate trim to the plotter. See Figure 6-10.
5. Using a TORX T-15 screwdriver, remove the bottom rear screw (hidden) that con-
nects each endcover to the sideplate.
Note
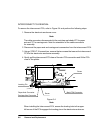
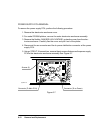
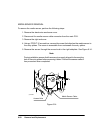
When removing the left endcover, pull the endcover out until you can reach
under the cover and disconnect the internal ac power cord from the internal
ac receptacle. Reconnect the cord during reassembly.
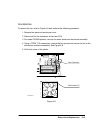
When removing the right endcover, do not stress or apply pressure to the
front panel assembly. Note the upper and lower grooves the endcover en-
gages on the front panel for reassembly.
6. Maintaining an even pressure on the top and bottom of the endcover, pull it away
from the plotter.