


●
For Windows Vista: Click the Computer item, click the Control Panel item, click the
Hardware and Sound item, and then, in the Printer group, click the Add a printer
item.
●
For Windows 7: Click the Devices and Printers item, and then click the Add a printer
button.
2. In the Add Printer Wizard, click the Next button.
3. When asked if the product is a local or network product, select Local printer attached to this
computer, and then click the Next button.
NOTE: Do not select the Automatically detect and install my Plug and Play printer
option.
4. On the Select a Printer Port screen, select the USB Print port that was created by a previous
USB installation, and then click the Next button.
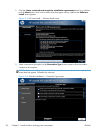
5. On the Install Printer Software screen, click Have Disk.... The Install from Disk dialog
box appears.
6. Insert the printing-system software CD into the CD-ROM drive.
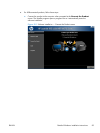
7. Click Browse..., and then select the printer driver for the product.
To install the HP PCL 6 printer driver, navigate to the root folder of the CD and select the
hppdp608.inf file.
To install either the HP PCL5 UPD or the HP PS UPD, navigate to where you downloaded the
update file from
www.hp.com/go/upd, and then select the file.
8. Click Open.
9. On the Install from Disk dialog box, click OK.
10. Click Next. Complete the installation. When prompted, print a test page to ensure that the printer
driver is installed correctly.
General Windows installation from the software CD-ROM for
network connections
●
Printer sharing disclaimer
●
Network setup
●
Windows installation instructions for network-connected products
●
Printer-driver only installation instructions (Microsoft Add Printer Wizard)
Printer sharing disclaimer
HP does not support peer-to-peer networking, as the feature is a function of Microsoft operating systems
and not of the HP printer drivers. Go to Microsoft at
www.microsoft.com.
76 Chapter 3 Install Windows printing-system components ENWW