scale: 1/4" = 1"
Scale:
3/8" = 1"
25186a
1
42 3
5
6
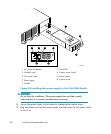
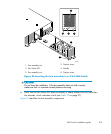
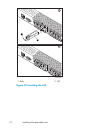
1. Fan assembly unit
2. Captive screw
3. Fan Status LED
4. Handle
5. Fan assembly unit
6. Captive screw
Figure 36 Inser tin g the fan a ss emb ly in a 4/64 SAN Switch
CAUTION:
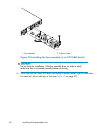
Do not force the installation. If the fan assembly does not slide in easily,
make sure that it is oriented correctly before continuing.
6. Verify that the Fan Status LED does not display a steady amber color for more than
five seconds, which indicates a fault (see Table 19 on page 97).
Figure 36 identifies the fan assembly components.
SAN Switch installation guide
105


