


98 Hardware Maintenance Manual: xSeries 220
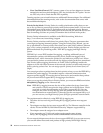
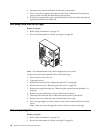
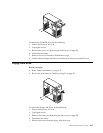
6. Disconnect the cable of the button kit from the system board.
7. Place a screwdriver against the bottom release latch of the button kit and gently
press upward and slide the latch through the aperture.
8. Gently pinch together the upper release latches and slide the latches through the
aperture and remove the button kit.
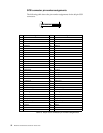
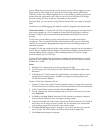
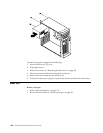
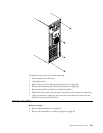
Hot-swap hard disk drive cage
Before you begin:
• Read “Safety information” on page 133.
• Review the information in “Before you begin” on page 58.
Note: The illustration above may differ slightly from your server.
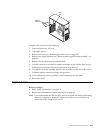
To remove the hot-swap hard disk drive, do the following:
1. Power-off the server, if it is on.
2. Unplug the server.
3. Remove the front bezel (see “Removing the bezel” on page 60).
4. Remove the cover (see “Removing the side cover” on page 59).
5. Remove the support bracket (see “Removing the support bracket assembly” on
page 61).
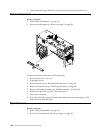
6. Remove any hard disk drives or drive fillers from the drives.
7. Disconnect the hard disk drive cables that connect to the system board.
8. Remove the screws from the front of the hard disk drive cage.
9. Move the cage slightly in and up until it is free of the chassis and lift it out of the
server.
Note: Take care not to dislodge the memory when you remove the cage.
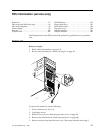
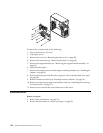
Hot-swap backplane
Before you begin:
• Read “Safety information” on page 133.
• Review the information in “Before you begin” on page 58.