


Tower-to-rack conversion 49
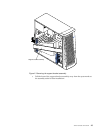
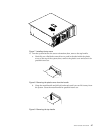
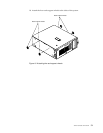
c. Use three of the screws that you removed earlier to secure the bottom cover;
then, use the fourth screw to secure the power supply.
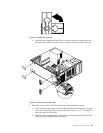
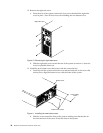
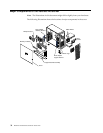
14. If your system has hot-swap drives installed, remove the hot-swap drive bay filler
panel from the new bezel that comes with the conversion kit.
Note: Attach the SCSI ID label that comes with the conversion kit on the front of
the bezel, just above where you removed the hot-swap drive bay filler
panel.
Figure 12. Removing the hot-swap drive bay filler panel from the bezel
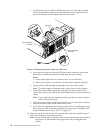
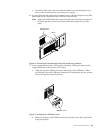
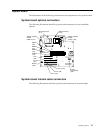
15. If your system does not have USB support, install the USB bezel insert over the
empty USB-block on the front of your system.
a. Align the top of the USB bezel insert with the top of the USB-block. Make
sure that the side of the USB bezel insert that will extend into the new system
bezel is facing away from the system.
Figure 13. Installing the USB bezel insert
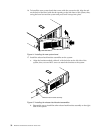
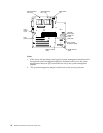
b. Rotate the bottom of the USB bezel insert toward the server; then, push until
it snaps into place.
Bezel
Hot-swap drive
bay filler panel
USB bezel insert