


Fast Ethernet
7100e+
154
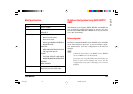
Configuration from TELNET
The Fast EtherNet can be configured using the TELNET related
to the workstation.
In the following explanation, SunSolaris 2.4 is used as an
example. The method of configuring each command may differ
from one workstation to another. Refer to your workstation’s
manual.
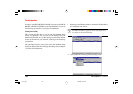
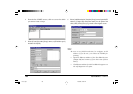
1. Using the APR command, set a temporary IP address on the
Fast EtherNet.
Example: If the IP address is “192.168.20.127” and the Fast
EtherNet address is “00:80:92:01:00:D2” [then enter]
# arp s 192.168.20.127 00:80:92:01:00:D2 temp
The EtherNet address (MAC Address) is displayed in
the print menu of the printer.
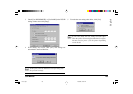
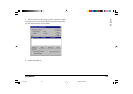
2. Use the ping command to confirm the connection with the
Fast EtherNet.
Example: If the IP address is “192.168.20.127”, [type]
#ping 192.168.20.127
If there is no reply, then there is a problem with the IP
address configured under Step 2 or with the
condition of the network. Consult your network
manager.
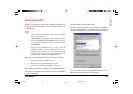
3. Log into the Fast EtherNet using TELNET.
For details, see (Using TELNET) (Page 109).
4. In the TCP/IP configuration screen, change the “DHCP/
BOOTP protocol” or “RARP protocol” to “Enable”.
5. Logout from the Fast EtherNet.
In order to enable new settings, turn the printer off and then
on again.
If the printer is not turned off and then on again, the
Fast EtherNet will continue to use the pre-
transmission setting values. Make sure to turn the
printer off and then on again.
7100e+.p65 25/08/99, 20:56 PM154