Scanning
Using Scan to Network
Scan to Network lets you scan your documents to network destinations specified by your system support person. After
the destinations (shared network folders) have been established on the network, the setup process for the application
involves installing and configuring the application on the appropriate printer using its Embedded Web Server. For more
information, see
“Setting up Scan to Network” on page 24.
Scanning to an FTP address
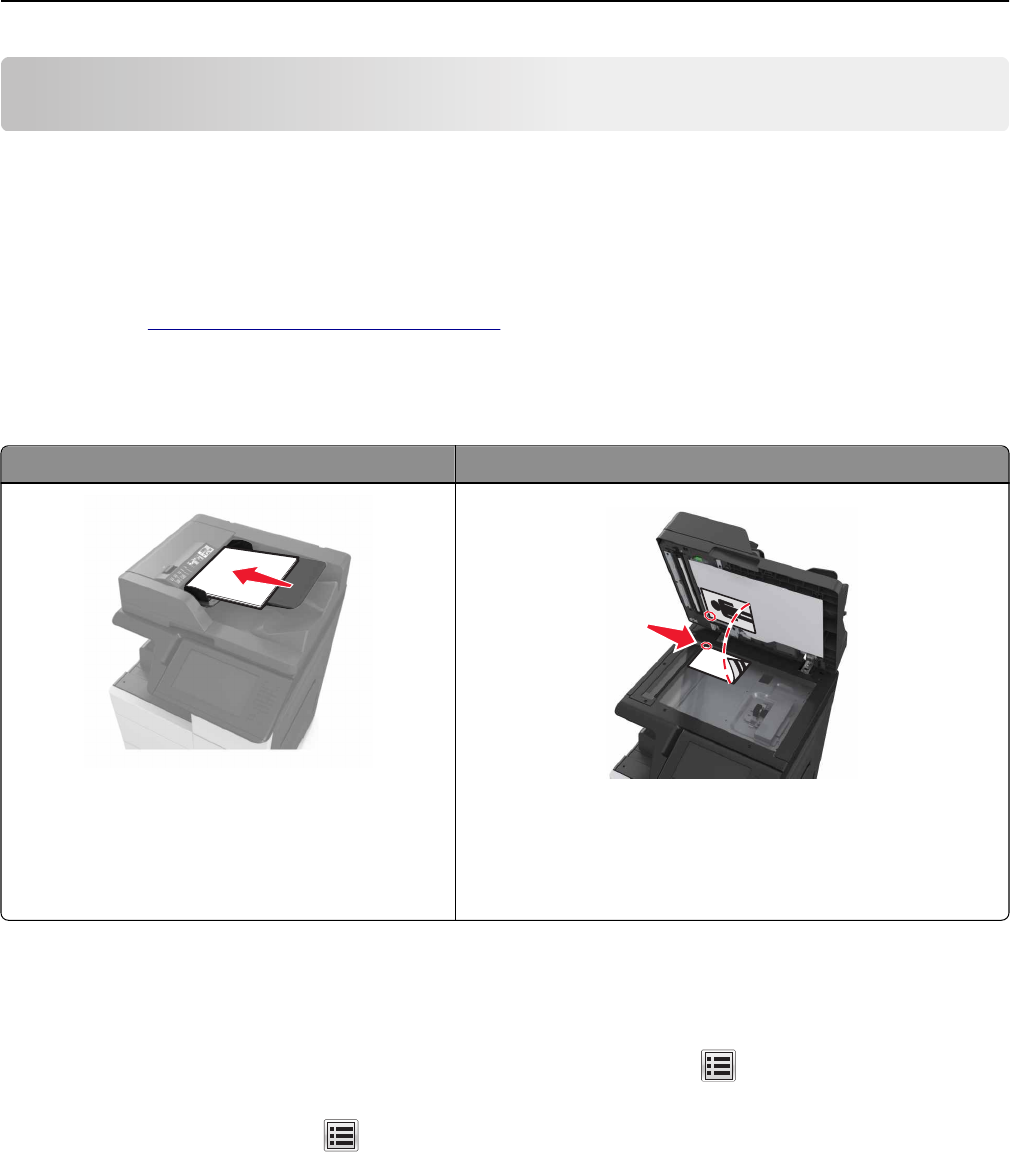
Automatic document feeder (ADF) Scanner glass
• Use the ADF for multiple‑page or two-sided
documents.
• Load the original document faceup.
• Use the scanner glass for single‑page documents, book pages,
small items (such as postcards or photos), transparencies, photo
paper, or thin media (such as magazine clippings).
• Place the document facedown in the corner with the arrow.
Creating shortcuts
Notes:
• Make sure that FTP Shortcuts is set to Display. From the home screen, touch > Settings > General
Settings > Home screen customization > FTP Shortcuts > Display > Submit.
• To delete an FTP shortcut, touch > Manage Shortcuts > FTP Shortcuts > the shortcut to delete > Delete
now.
Creating an FTP shortcut using the Embedded Web Server
1 Open a Web browser, and then type the printer IP address in the address field.
Scanning 112
