


Manually set basic fax information
24
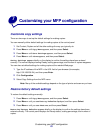
To restore the default settings through the resident Web page:
1 Type the IP address of the MFP in the URL field of your browser (for example,
http://192.168.236.24), and then press Enter.
2 Click Configuration.
3 Select Copy Setup from the MFP menu.
4 Find the Factory Defaults drop-down box, and select Restore.
5 Click Submit.
Manually set basic fax information
If you have purchased a MarkNet N2501e print server, during power up the message Please Set
Time appears. This is the prompt to begin the required fax setup.
1 On the control panel, press Menu> repeatedly until you see Fax Quick Setup, and then
press Select.
2 When Country/Zone appears, use Menu> to find your country and time zone (for example,
Eastern), and then press Select to save your choice.
3 Set the current date and time:
• If the correct date and time appear on the display, press Return to go to the next menu
item.
• If the default date and time appear (1900-01-01 15:35) on the display, use the numeric
keypad to change the numbers in each field. After the date and time are set, the next
menu item appears.
4 When you see Station Name, enter your name or company name using the numeric keypad
on the panel.
5 Press Return when you have finished entering your Station Name. SAVED briefly appears.
6 When you see Station Number, enter your fax phone number using the numeric keypad.
Special tips for using the numeric keypad
• Repeatedly pressing each button changes it from a number, to the uppercase
character, to the lowercase character, and then to the next character.
• Pressing Menu> or <Menu scrolls through all choices. This method offers you
additional characters not found on the numeric keypad, such as left and right
parenthesis, dashes, quotes, and so on.
• Press Copy Size to move to the next field or Original Size to move to the
previous field.