ETU400 User Guide 011603
5-9
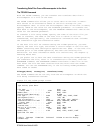
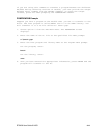
4. Choose the spool file you want to transfer.
Press the TAB key until the cursor is next to the spool file you want to
transfer. In the left-most column, type a 2(Copyprt and transfer) next to
the print item.
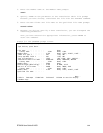
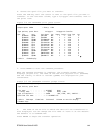
Figure 5-4 The PRTFROM3X Print Queue Screen
1/03/03 14:15:31 Select "COPYPRT" File NLRISCLIFF
Output queue: PRT01 Library: *LIBL
Type options, press Enter. 1=Copyprt 2=Copyprt & Transfer
Opt File User User Data Sts Pages Copies Form Type Pty
QPJOBLOG QPGMR QXOTJOB RDY 1 1 *STD 5
QPJOBLOG QSYS QPASVRP RDY 1 1 *STD 5
QPJOBLOG QPGMR QSYSWRKJOB RDY 1 1 *STD 5
QPJOBLOG QPGMR QFSIOPJOB RDY 1 1 *STD 5
QPSRVDMP QTCP QTLPD11518 RDY 1 1 *STD 5
QPJOBLOG QTCP QTLPD11518 RDY 1 1 *STD 5
QPJOBLOG QTCP QTPST17265 RDY 1 1 *STD 5
QPJOBLOG QTCP QTLPD11518 RDY 1 1 *STD 5
QPJOBLOG QTCP QTLPD11518 RDY 1 1 *STD 5
QPJOBLOG QPGMR QSTRUPJD RDY 6 1 *STD 5
QPJOBLOG QSYS QWCBTCLNUP RDY 1 1 *STD 5
QPJOBLOG QSYS QWCBTCLNUP RDY 1 1 *STD 5
QPJOBLOG QPGMR QDB2MULTI RDY 1 1 *STD 5
F3=Exit F5=Redisplay
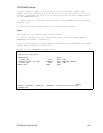
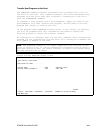
5. Press ENTER to start the CPYSPLF procedure.
When the CPYSPLF procedure is complete, the Transfer prompt screen
displays (Figure 5-5). The name of the new host physical file (PCPRINT)
and the library in which it resides (QTEMP) are displayed for your
convenience.
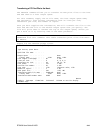
Figure 5-5 The PRTFROM3X Transfer prompt screen
Transfer from 3X: (FROM3XB)
Type choices, press Enter.
File name: . . . . . . . . . . . > PCPRINT Name
Library name: . . . . . . . . > QTEMP Name, *LIBL
Type of translate ?: . . . . . . > *NONE *NO, *TEXT, *DIF, *BASICS...
Qualified file name: . . . . . . > 'C:\PCPRINT.LST'
Bottom
F3=Exit F4=Prompt F5=Refresh F12=Cancel F13=How to use this display
F24=More keys
6. The name of the PC file to which the data will be transferred is
also displayed. You can change the file name or leave it at the default.
The default is C:\PCPRINT.LST.
Press ENTER to begin the transfer operation.


