PRINTER NOTE: Page size 9” x 9.25”. Align this page to top, right hand corner. Back box bleeds off
top and right edge. Left side of page extends to 9.25 inches.
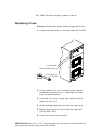
Replacing the DEU Cabinet
Caution: Drives and printed circuit board components
are sensitive to electrostatic discharge. To prevent
operating failure or damage, observe the following:
Establish a ground for yourself by using the wrist
grounding strap, or by touching the metal chassis prior
to handling or installing the drives or printed circuit
board components.
1
Remove your new cabinet from the shipping carton
and inspect the shipment. Save the packaging
material.
2
Down your server and turn off the computer system.
Turn the power off to the old DEU cabinet.
Note: Note the position of the data cables, disk drives,
and the jumpers on termination interface cards prior to
disconnecting or removing the items. To facilitate
correct installation, you may want to tag the cables
appropriately. The drives should have a drive label
located on the front of each drive unit.
3
Remove each drive noting its position and store them
in a safe location.
4
Disconnect the data and power cables from the old
subsystem.
5
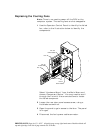
(Rack Mount Systems Only) Remove the DEU from
the rack assembly.
6
(Single-Bus Modules Only) Remove the Single-Bus
configuration module from the old cabinet and
install it into the new cabinet.
7
(Rack Mount Systems Only) Install the new DEU
cabinet into the rack assembly.
8
If you have a third power supply unit installed in
the old cabinet, remove it and install the PSU into
the new cabinet.
9
Reconnect and secure the power cord and data
cables.
10
Install the drives into the new cabinet in exactly the
same order as they were in the old cabinet.
11
Power ON the new DEU subsystem.


