


26 C2928M-A (4/07)
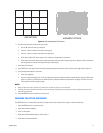
9. Look at all the displays together. Stand far enough away from the wall so that you are looking almost squarely at all of them. Pay attention
to the large central area, not the edges.
10. Find the darkest display. This will serve as the baseline display for adjusting all of the displays in the wall. Do not change any settings on
this display.
11. Choose a display next to, above, or below the baseline display. This will serve as the variable display.
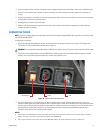
NOTE: To avoid activating another display within the wall, stand within 18 inches (46 cm) of the target display when using the remote.
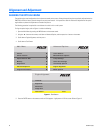
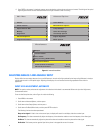
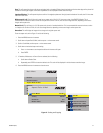
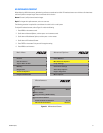
12. Point the remote directly at the screen, press ENTER to open the Color Balance menu, and then do the following:
a. Scroll to White Balance-All. Press the – button on the remote to reduce the brightness until it matches the baseline display.
b. Scroll down to Red. Press the + and – buttons on the remote to adjust the amount of red in the image to match that of the baseline
display.
c. Scroll down to Green and repeat adjustments from step b.
d. Scroll down to Blue and repeat adjustments from step b.
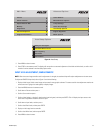
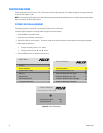
e. To save all of the current settings to a temporary memory, scroll down to Copy to Clipboard and then press ENTER. Further
adjustments can be made to try to improve the image, but if they do not improve the image, scroll down to Recall From Clipboard to
restore the previously saved settings.
NOTE: The clipboard is only for testing. These values are not saved when AC power is off.
f. Once the image matches that of the baseline display, scroll down to Hide Menu, and then press ENTER. This adjusted unit is now a
baseline display.
13. Repeat steps 11 and 12 for the remaining displays. Use adjacent baseline units for adjusting variable units.
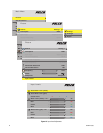
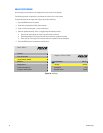
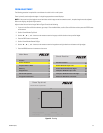
14. For each display, open the Color Balance menu by pressing ENTER on the remote.
15. Scroll down to Test Pattern and press ENTER to change the setting to Gray.
16. Find the display with the least amount of gray. This will serve as the baseline display for adjusting all of the displays in the wall. Do not
change any settings on this display.
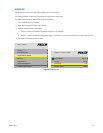
17. Choose a display next to, above, or below the baseline display. This will serve as the variable display.
18. Repeat steps 12 and 13 applying them to Gray Balance-All, and associated Red, Green, and Blue settings.
19. After adjusting all units in the wall, turn off the test pattern for each display by doing the following:
a. Press ENTER on the remote.
b. Scroll down to Test Pattern.
c. Press ENTER to change the setting to Off.
20. Press MENU on the remote to exit the menu.
SPREADING ONE PICTURE OVER A WALL
To spread one picture over a wall, an external controller must be used. Contact Pelco for information on compatible products.
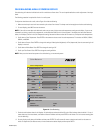
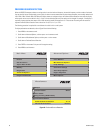
SCALING AND CROPPING
The following procedure is required for a stand-alone unit and all units in a wall system.
In some cases, the aspect ratio of an image does not match that of a wall. The aspect ratio of an image is its width divided by its height.
Example: 1024 ÷ 768 = an aspect ratio of 1.33.
The native aspect ratio of the PMCD750 is 1.77 (16 x 9), the same as HDTV. When the aspect ratio of the source image and the PMCD750 wall
differ, it may be necessary to make an adjustment. The following options are available:
Fill All: This will stretch the picture until it touches all edges of the display. This setting can produce some image distortion.