


Line Painter 1200Page 5 – 18Paint System
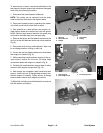
Check Valve Service
The one–way check valve that is positioned between
the flush (water) tank and the ball valve (see schematic)
prevents paint from entering the flush (water) tank when
the paint/flush lever is moved from the paint position to
the flush position and while the machine is operated in
the flush mode.
NOTE: If the flush system is not cleaned after use, di-
luted paint may cause check valve and associated
hoses to become blocked. If the check valve is stuck
open, paint may enter the flush (water) tank when the
paint/flush lever is moved from the paint position to the
flush position. If the check valve is stuck closed, the flush
system may not operate.
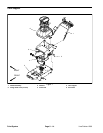
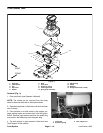
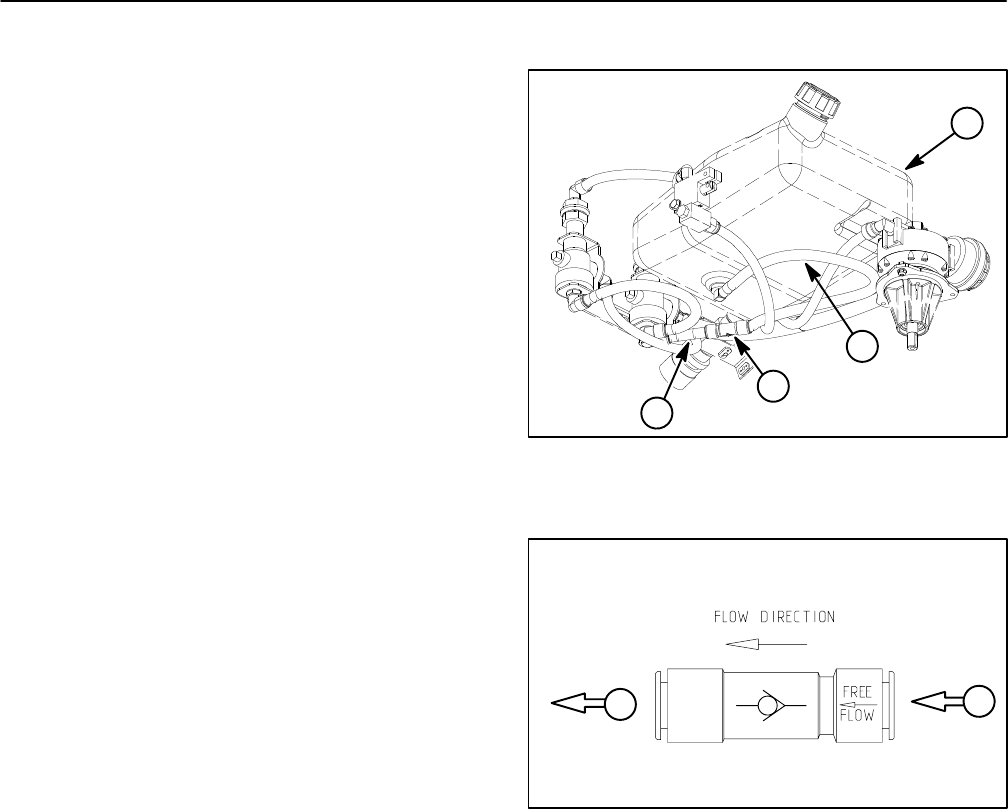
1. Remove flush tank (see Flush Tank Removal in this
section).
2. Remove check valve from tubes (see Quick Discon-
nect Fitting in the General Information section) (Fig. 16).
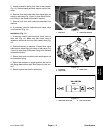
3. Inspect check valve:
A. The spring loaded plunger in the check valve
should unseat with very light pressure when pressed
on with a suitable probe. Take care when pressing on
the plunger not to damage the check valve or to allow
contaminates into the valve.
B. If the check valve is stuck due to dried paint, soak
check valve in water to clean. If soaking in water will
not free valve, check valve replacement is neces-
sary.
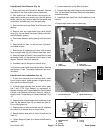
4. Install check valve to tubes (see Quick Disconnect
Fitting in the General Information section) (Fig. 16).
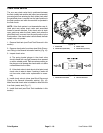
Make sure that check valve is installed to allow free flow
from flush (water) tank (Fig. 17).
5. Install flush tank (see Flush Tank Installation in this
section).
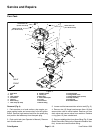
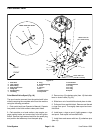
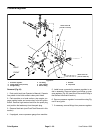
1. Flush tank
2. Outlet tube (from tank)
3. Check valve
4. Outlet tube (to valve)
Figure 16
1
2
3
4
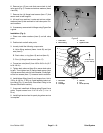
Figure 17
1
2
1. Outlet tube from tank 2. Tube to ball valve