20
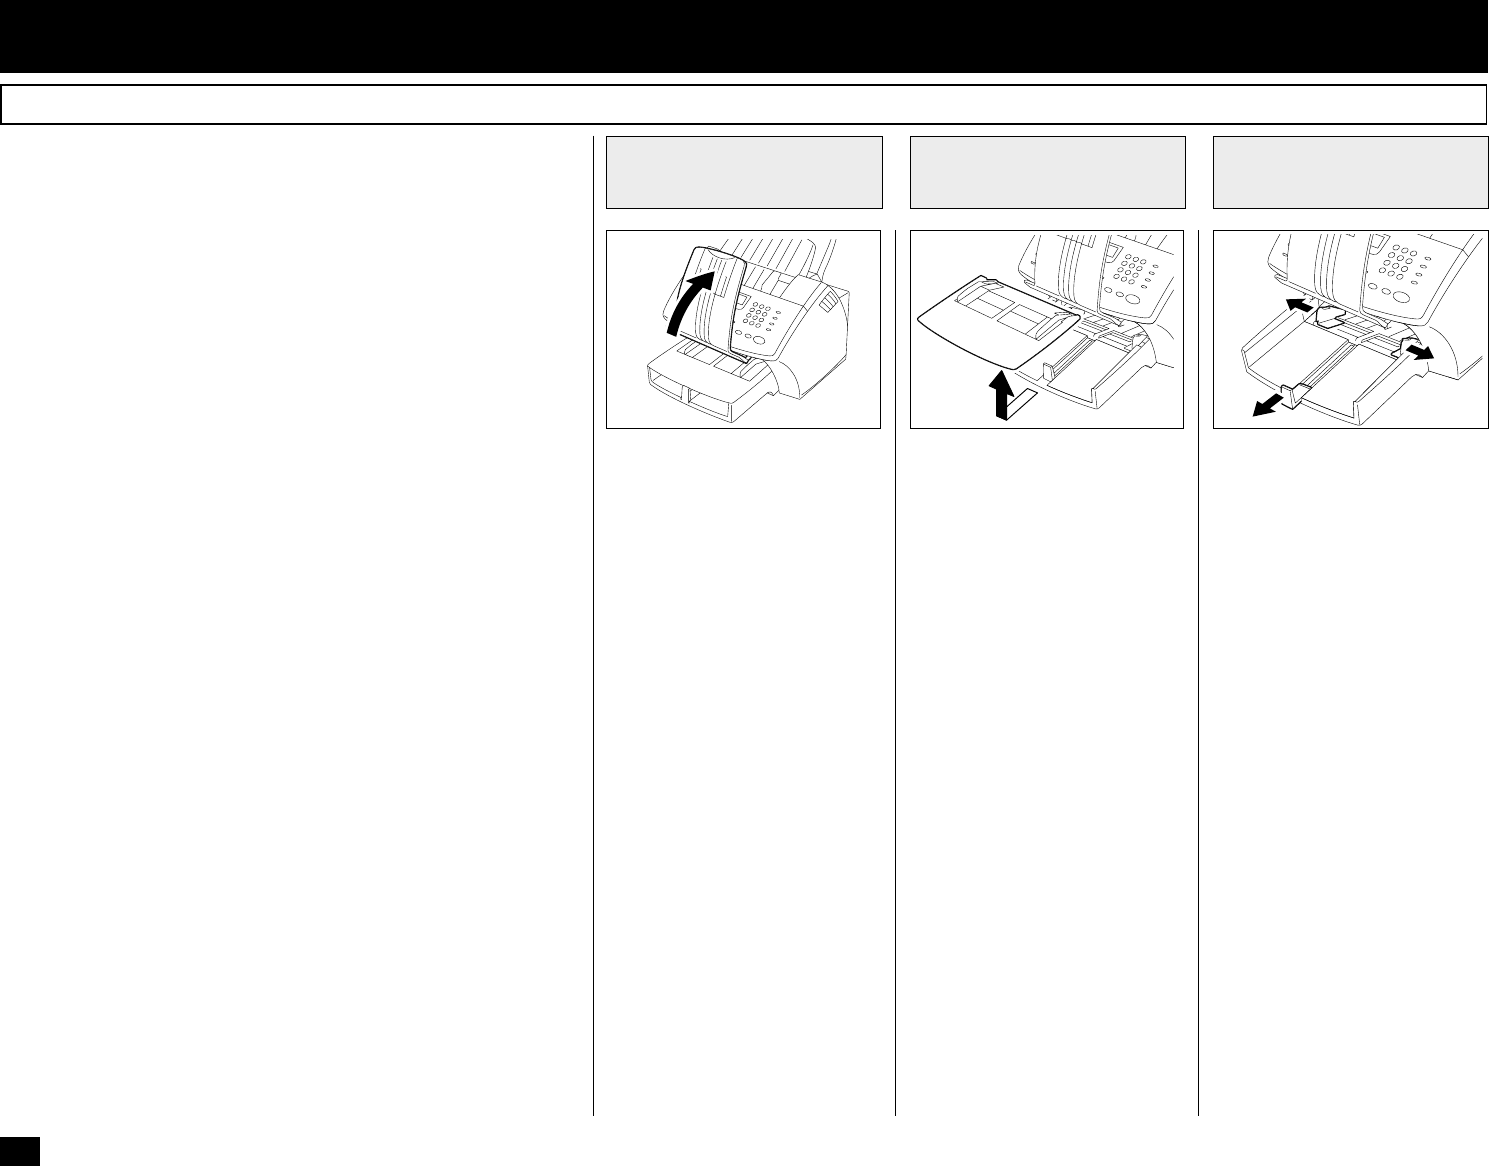
Pull up the Document Exit Tray.
If you raise the tray high
enough, it will latch onto the un-
derside of the Operation Panel.
CAUTION:
• Do not place heavy objects
on the Document Exit Tray
or apply strong force.
Remove the Bypass Tray from
Recording Paper Tray.
Open the Paper Guides.
About Recording Paper:
• Use only recommended pa-
per brands to optimize your
facsimile performance. Con-
tact your authorized TOSHI-
BA dealer for more informa-
tion.
• Remove the recording paper
when storing or relocating
your facsimile.
• Avoid using damaged, folded
or misaligned recording pa-
per. Use of damaged paper
could cause double feeding
or paper jamming.
• Use of damp recording paper
will cause poor printing over
all or part of the image area.
If the paper is excessively
moist, print quality may be-
come uneven and voiding
may occur. Replace the pa-
per, should this condition ex-
ist.
• Do not add paper on top of
the paper already in the ma-
chine. If you wish to add pa-
per, first remove the existing
paper. Then stack the exist-
ing paper with the new paper
before inserting into the ma-
chine.
- INITIAL PRINTING SUPPLIES INSTALLATION
Pull Up the
Document Exit Tray
1
Open the Paper
Guides
3
Remove the Bypass
Tray
2
Recording Paper Installation (Recording Paper Tray)
25 30
31
About Paper Sizes:
• Your TOSHIBA facsimile has
been preset to accept letter
size recording paper.
In the event that you receive
a legal-size (8.5”x14”) recep-
tion, it will automatically be
reduced to fit onto letter-size
(8.5”x11”) paper.
• If you receive only legal-
size receptions and do not
wish them to be automati-
cally reduced: Load the le-
gal-size paper in the tray.
• If you receive a mixture of
letter and legal-size recep-
tions, and you do not wish
your legal receptions to be
automatically reduced:
Add an optional recording
paper tray to support both
letter and legal-size paper.
With the second recording
paper tray, your TOSHIBA
facsimile will automatically
select the appropriate paper
size to match the pages you
receive.


